Monday, January 31, 2011

Gluten Free Beef and Vegetable Soup


A few months ago, Truman (my son) was having stomach problems-- waking up in the middle of the night crying for hours about how his stomach hurt. As a mother, I felt so helpless. We tried a lot of things. Taking dairy out of his diet, going gluten free and so on. In a couple months, the episode was over and we still don't know what the problem was.

But I do still have a few gluten free foods leftover in the cupboard-- for instance, Qunioa Elbow Pasta. This pasta is amazing, because it tastes just like pasta should. It's perfect for soups, tomato based dishes and mac-n-cheese.
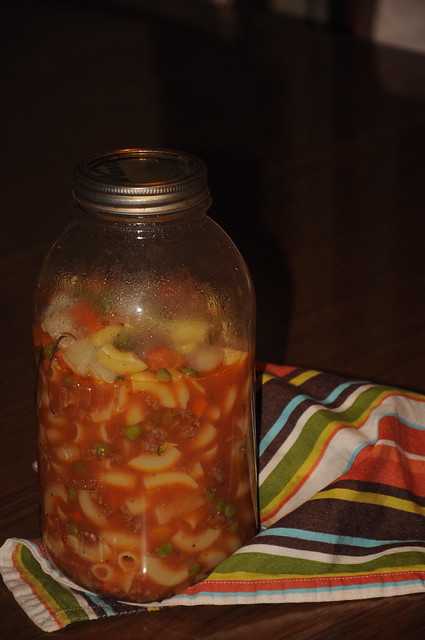

Gluten Free Beef and Vegetable Soup
1/2 lb. Lean Ground Beef
1/2 Medium Onion chopped fine
1 Can of Diced tomatoes-blended until smooth
6-8 Cups of gluten-free Chicken Stock (or make your own)
1 Cup frozen peas and carrots
1 clove chopped garlic
1 cup chopped broccoli
2 small potatoes chopped
1 box Quinoa elbow pasta


In your stock pot use 2 tablespoons of olive oil and saute ground beef and onion until no pink is visible. Add garlic and blended tomato then chicken stock. Bring to a boil. Salt to taste. Add vegetables. Bring back up to boil. Add Quinoa pasta cook about 6 minutes.

Salt and pepper to taste.
 This soup is quick to make. Warm and filling... serve it with some GF crackers. No one will ever know it was all made without flour! 

Sunday, January 30, 2011

Organic Vegetarian Roasted Butternut Squash Soup.

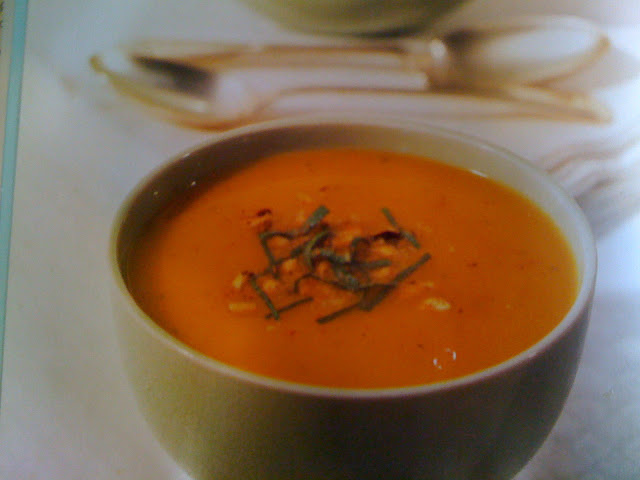
I love making soups and stews, particularly in the winter. It must be the Irish in me. I have found though that my family will enjoy a delicious bowl of soup anytime of the year. Whatever vegetable is in season I will take advantage and make soup and freeze it. Of course living in Southern California, other than heirloom tomatoes which come and go, most other veggies are available all year round. Butternut squash is one of those and happens to be a family favorite of ours. Whether we just roast it, puree it or make into a soup, we all seem to love this particular fruit/squash/veggie.

I found this recipe in a Williams-Sonoma Soup for Supper cookbook years ago and I have enjoyed exploring and changing this recipe over the years and each time it seems to be better than the last. I like to make this soup on a Sunday, serve it with dinner on Sunday evening and then freeze the rest for later in the week or another time.

Prep Time: 30 minutes, plus 1 hour for baking squashes.
Cooking time: 20 minutes

Organic Ingredients:
2 medium to large butternut squashes (1/12-2 lb) each
2 celery stalks
2 carrots
2 yellow onions
8 fresh sage leaves, shredded
2 - 3 oz of hazelnuts
3 tablespoons of butter (sometimes I substitute olive oil)
Organic low sodium vegetable stock
Salt and pepper to taste

Roasting the squash makes it easier to peel and deepens the flavor of its flesh, making a richer, more flavorful soup. Preheat the oven to 400 F.

Wash each of the squashes skin thoroughly before cooking. Using a sharp knife cut each squash lengthwise in half, scoop out the seeds (seeds can be saved and roasted later and enjoyed as a healthy snack). Place the squash cut side down in a glass pyrex or similar dish, add approx 2 cups of water to the dish so that it's just coming up the side of the squash but not covering it. The thing I love about this recipe is I can cook the squash the day before or hours in advance of actually making the soup, just pop it in the oven while you are busy around the house, it's actually better because then it's cool enough to handle. Cook the squashes for about an hour or until tender or soft. Remove from the oven, save the water in a bowl or pot and set aside (this will be used as stock in your soup). Once it's cooled down scoop the pulp into a bowl and set aside.

While the squashes are cooling, in a saucepan over low heat, melt the butter. Add the onions, celery and carrots, stirring occasionally, until the onions are tender and translucent, 8-10 mins. Add the sage leaves (I always have organic sage growing in my herb pot). Add the squash pulp to the pot, as well as the water/stock you set aside from roasting, then add enough vegetable stock to cover the ingredients in the pot. Bring it to a boil, stirring occasionally to avoid burning the veggies and reduce heat to a nice simmer, continuing to stir occasionally, I like to cook it slow (although the recipe says 20 mins of cooking time) I tend to let it simmer longer and slower I think this adds to the flavor of the soup. While the soup is cooking I put the hazelnuts in a food processor and grind them well till there are no hard pieces of nuts, so just before a powder consistency. Once the soup is cooked, working in batches, puree the soup in a blender and with each batch being pureed add some of the hazelnut so that it all gets blended together. The blended soup has a rich and creamy consistency. Return to a clean saucepan over low heat and serve in warmed bowls.

We usually have a delicious salad and some warmed bread. I don't add salt or pepper in the cooking process of this soup and in fact I don't add seasoning at all to mine when I eat it, I personally don't think it needs it, let me know what you think.

If I'm going to freeze some of the soup which I usually do I will fill 16 oz paper containers like the one in the picture which I have found at either Surfas in Culver City (they don't always carry them though) or at Smart and Final stores, don't forget to buy the lids to fit. I write the name of soup, making a note that it has nuts (in case I am serving someone who is allergic to nuts) and the date on the lid and put it in the freezer for a future lunch or dinner. When you take it out of the freezer, with a sharp knife cut a line down the side of the container at the seam and you will be amazed at how easy it is to peel the paper right off the frozen soup and pop the soup in a pot over low heat so it doesn't burn, it takes about 10 mins. to warm the frozen soup and voila.
Recycle the paper container and lid.


Saturday, January 29, 2011

Spatchcocked Chicken Night

Heather, Jemma, Joan, Michelle and I can tell you, this was one fun and silly night. This gaggle of gals and dads and kids gathered -  each with our contribution and Jemma's was this quick-to-make chicken. Wonderful, yummy, quick. We also found ourselves mimicking Dan Aykroyd mimicking Julia Child (ah...) in an English accent as we pitched the bird into the oven. I'm quite aware you had to be there. But kitchen fun is worth recalling.

This recipe calls for a whole, spatchcocked chicken. The technique is described in the recipe below, but I'll venture the guess that it can be done with a cut up chicken. Which makes it viable for a weeknight. I'll try it and report. But, you can too.

Served along with: salad, brown rice, dessert. The sauce is very tasty over rice!

Let us know what you like in a comment!

Spatchcocked Chicken with Tomatoes - Recipe

Use a 3-4 pound chicken. Turn it breast side down on a cutting board and starting at the bottom, cut upward with kitchen shears, along the backbone. Cut along the other side and remove backbone. Turn the chicken and flatten it in true butterfly style by applying pressure with your palm. (Here's a video of a more complete method and a more refined method, which makes it easier to cut for serving.)

Spatchcocked Chicken with Tomatoes
Preheat oven to 500 degrees.
Season spatchcocked chicken with coarse salt and ground pepper and place, breast side up, in a pan (or on a cookie sheet) with 3 unpeeled garlic cloves, smashed. With the tip of a paring knife, pierce 1 pint cherry tomatoes. Add to pan and drizzle tomatoes with 1 teaspoon olive oil; season with salt and pepper. Pour 1/2 cup dry white wine and 1/3 cup water into pan. (we forgot the wine and it was delicious...) Roast chicken until juices run clear when pierced between breast and leg (to 165 degrees at the thickest part of the meat) 30-40 minutes. Let rest 5 minutes. Sprinkle with 1/4 cup basil leaves before carving.

Taken from Martha Stewart Everyday Cooking July, 2010. 
Also see Martha Stewart's website recipe.

Friday, January 28, 2011

What about French Omelets?

One of my first food remembrances is of Saturday morning omelets.

My dad would, very often, make tomato and cheese omelets. (While singing - I add.) They were wonderful. So, omelets have always been part of my culinary repertoire. But the game changed when I saw Julia Child make her French Omelet.


They are so good that my kids,  ask for them by name: "please, a Julia Child this morning."

And here's the kicker: my husband who's kitchen adventures are limited to Meat Square (later) and scrambled eggs, watched the video because he wants to make them. (I do love Julia!)

Take a peak and later in the week. We'll give you a whole post on how this can be dinner. And yes, I've served this at a dinner party for six and it was, shall we say, magnifique!

Thursday, January 27, 2011

Happy family food, happy family and friends - Lasagna Soup


There is nothing better than walking in the door from a busy day to find the aroma of a delicious home cooked meal lingering in the air. This meal is one of those miracle meals that is savory enough for the adult palate, yet pleasingly simple to tantalize the mouths of babes.

The added plus to this meal which ties in nicely with Kerry's meal planning post from yesterday, is to double it for a planned meal at a later date. When preparing the recipe, make a double batch, freeze one to put in on your two week planner for 2 to 4 weeks from now. Keep accumulating meals this way and you end up with little fuss and lots of peace of mind for meals to come all year long.

Tonight I will serve one batch to my daughter's Girl scout troop and then in two weeks to my family at home.


The Recipe;
Lasagna Soup ( though it's thick like stew)
compliments of Family Fun Magazine's Meredith Deeds recipe 2/09
2 teaspoons olive oil
1 1/2 pounds Italian sausage (bulk or casing removed)
2 onions, finely chopped
4 garlic cloves, minced
2 teaspoons oregano
1/2 teaspoon red pepper flakes
2 Tablespoons tomato paste
1 28 oz can diced tomatoes
6 cups chicken broth
2 bay leaves
8 oz fusilli pasta (uncooked)
1/2 cup finely chopped fresh basil
8 oz ricotta cheese
1/2 grated Parmesan
1/4 teaspoon salt
Pinch of pepper
2 cups shredded mozzarella

1. In a large pot, heat olive oil, add sausage and saute, breaking it up into small pieces. until sausage is no longer pink.
2. Add onions and saute until softened.
3. Add garlic, oregano, and red pepper flakes and saute.
4. Add tomato paste and saute until rusty brown.
5. Add tomatoes with their juice, the broth, the bay leaves and bring to a boil.
6. Reduce and heat for 3o minutes.
7. Add the uncooked pasta, then increase heat to medium and boil until pasta is tender to the bite.
8. Discard bay leaves, stir in basil, season with salt and pepper to taste.
9. In a small bowl, combine ricotta, parmesan, the 1/4 teaspoon of salt and pinch of pepper.
10. To serve, place 1 1/2 tablespoons of ricotta mixture in each bowl, sprinkle with mozzarella and ladle the soup over the top. Makes about 13 cups.

Enjoy!


Tuesday, January 25, 2011

Meal Planning and a Bonus Recipe

I doodle out a meal plan for my family every two weeks.  I find that a good amount of time for us to plan ahead.  No matter how well I plan though, things always get shifted and changed, but it's a routine now and it works.  Here's our plan from last week and this.
Now for the bonus recipe:
Easy Tex-Mex Frittata
I made this for breakfast using leftovers from the taco salad we had last week.  By my calculations, the whole thing topped out at less than 300 calories.  Not too shabby.
Heat a small, oven-proof, non-stick pan and coat with cooking spray.  Add 1/4 cup chopped tomatoes and 1/3 cup cooked black beans.  I also had about 2 tbsp of seasoned ground turkey leftover from the salad too.  (Who saves that amount?  It worked for this though!)  Heat the "filling" ingredients through, then whisk together 1 egg and 2 egg whites with about 1 tbsp of water.  Pour the eggs into the pan over the heated tomatoes and beans.  Cook until bottom is set.  Sprinkle about 2 tbsp of sharp cheddar cheese over the top and shake on hot sauce as desired.  Pop the pan into a 325 degree oven for about 5 minutes until the eggs have set.  This easy and filling breakfast can be made with a huge variety of leftovers.  Maybe next time you should save those two spears of asparagus, the few bites of ham, or the little bit of parmesan... it just might turn into a terrific breakfast.

Monday, January 24, 2011

Frugal Meal Planning and Perfect Timing

Sometimes we find ourselves exactly where we're supposed to be.
I just found myself on Ruth's blog and guess what her topic is?


and she has great, great, great ideas.

Check it out.

Thank you, Ruth!

Sunday, January 23, 2011

Handy Man

This is the Hot Man.
Really, the Hot Man.
He attended out birthday celebration yesterday. Actually, Joan gave Jemma, Michelle and I each a hot man.
Apparently we need him.
While it looks like he brought flowers for the birthday girl, which would, I suppose, make him a hot man,  he's one of those supportive guys who hangs around the kitchen. Keeps you from burning a surface by lying down and holding a hot pan.
I need the hot man.
He also provides plenty of amusement in my house.
He seems to move all over the place with the help of the my husband.
And, red fits will with my kitchen colors,

So, welcome to my world Hot Man, welcome.

Saturday, January 22, 2011

Monkey Bread - Saturday morning fun

Monkey bread came into our family in the 70's when my grandma found a recipe and began serving it with dinner on occasion. Edith's version was made like a dinner roll, completely savory (and buttery) and built in bites like the one in the picture. But ours today, the one in the picture, is a cinnamony-sweet breakfast treat - something we love to make, especially with friends or the cousins.
This particular version came from our fabulous friend, Bonnie, who introduced it as a breakfast treat for kids on mornings when she drove them to school. Her big boys (her trees!) love it - it was sure to be a hit. So, on those early, yummy, cozy mornings, when she wasn't delighting them with crepes or breakfast burritos, she made Monkey Bread. My kids wanted, desperately, for me to make it too.

This particular recipeis calls for frozen bread dough, butter, sugar, cinnamon and a knife. I learned in my first tries that you must let the dough not just thaw, but rise and that bigger pieces are better than smaller pieces.

Here's our super simple recipe:
1) Thaw a loaf of frozen bread dough. We like Bridgeford.
2) Heat your oven to 350 degrees.
3) Spray a bundt or angel food pan with Pam.
4) Melt a stick of butter, place it in a shallow dish or bowl.
5) Place about 1:4 ratio cinnamon:sugar in a shallow dish or bowl - you could use a whole cup
6) Cut the risen dough into bite sized pieces (we cut the loaf in width-wise strips and then  into thirds).
7) Assemble by dipping cut bread into first butter then sugar and build in the pan.
8) Save left over butter or c/s for next time!
8) Bake in 350 over for about 35 minutes. (The dough at the top of the pan will be lighter than that pictured.)
9) Cool a few minutes, then turn the ring of yumminess over on a pan and serve.

There are several recipes for monkey bread. Erin's has ice cream in the mix! And there's even a kit you can buy.

What I love the most about monkey bread is how it makes my monkeys jump for joy!