Thursday, March 31, 2011

Quick Grilled Chicken Soft Tacos Ole'


Ah, with the slightest hint of warm weather fun it's Grilled Chicken Taco Time!

This can be thrown together in a matter of minutes and prep can take place even the day before for a really on the fly but good for you dinner for all.


Here's what you need:

Taco size corn tortillas
4 Skinless Chicken Breasts
1 tspn grilled chicken seasoning
1 Avocado
1 Jar of your favorite Salsa
1/2 Lb graded Cheddar Cheese
Lettuce (optional)

Prep: about 10 minutes
Cook: about 11 minutes

Here's what you do:

Take clean, lightly seasoned (grilled chicken seasoning) whole chicken breasts and toss on your Outdoor Grill, George Foreman Grill, or in your Broiler for about 6 minutes on side one and another 5 on side two until cooked through.
Remove from grill and set aside to cool slightly.
while chicken cools, grate your cheese, or for another time saver use pre-grated cheese from your favorite market.
Steam your torillas for a few minutes to soften-I use a shallow pot with a steamer basket.
Slice the avocado into chunks, and chop your lettuce if using.
Now, back to your grilled chicken, cut the breasts into 1 inch cubes.
Now you're ready to assemble!
Set all the ingredients out in separate bowls to allow your family to build their own fun.
Pile the ingredients to your liking in double tortillas for a sturdy meal, top with salsa and you are ready to go!
Add a side of black or vegetarian refried beans for good measure. Ole'

Tuesday, March 22, 2011

Crazy Week Night Sweets


Eric, my husband and I have worked together at most jobs we've had for the last 10 years. Mostly in resturaunts, but even now we get up together, get ready together, get the kids off to daycare together and we then, walk through the front doors of our work together.

A few years ago we worked at this place that had the best "Sweets" or sweet potato fries-- I actually almost forgot about them until on a date night we ordered sweet potato fries at another resturaunt. And we were sorely disappointed, not enough sweet or salt. And with the long-lost taste of Sweets in my mind, I could not get over it.

So last night, when I was home with two sickies. I found that I needed dinner, quick! And the two sweet potatoes staring at me on the counter got me thinking again. 

So I made my own version, a baked version with more sweet, and more salt. Not nutritious... but delicious. These are quick and the kids will eat them!
Baked Sweets
1 Tbs brown sugar 
1 tsp white sugar
1 tsp cinnamon
1/2 tsp salt
2 pounds sweet potatoes, unpeeled and cut into long strips
1 tablespoon olive oil Spray or grease a baking sheet pan. Preheat oven to 400°F. Mix brown sugar, sugar,  cinnamon, salt with  sweet potatoes and oil in a mixing bowl. Spread sweet potatoes in single layer on prepared baking pan. Bake 25-30 minutes or until sweet potatoes are tender and a little crispy.
 Photo

Monday, March 21, 2011

Pretty Recipe Keeper


I have so many recipes on cards and as tear outs from magazines etc. I wanted a pretty place to nestle them among my cookbooks for ease of use. As luck would have it I received a beautiful photo album in a unique size that I had an Ah ha moment for ( I fancy using things for unexpected uses)! This pretty book would become my recipe friend and confidant.


Do you have a pretty album that is going unused?

I sectioned my book into 3 basic groupings of appetizers, meals and desserts. Of course you can break things down in the way it best suit you.

Now my Great Aunt Flossie's dish can be savored from it's original form - an old ingredient stained card. It will be served right along with the Crock Pot Brownie I featured last week!

Thursday, March 17, 2011

Happy St. Patrick's Day & Irish Soda Bread

I put this tasty bread into the oven this morning and the house smelled like St. Patrick's Day. No, no corned beef or cabbage, but a lovely traditional Irish Soda Bread. Warm, mildly sweet with currants and (not today) caraway seeds.

Irish Soda Bread

Heat oven to 350 degrees.
Use 2 Tablespoons of butter to season the skillet (or pan)
Whisk together:
  • 3 cups all purpose flour
  • 1 1/2 teaspoons salt
  • 1 Tablespoon baking powder
  • 1 teaspoon baking soda
  • 1/3 cup sugar
  • 1 cup currants
Add, mixed:
  • 1 3/4 cups buttermilk
  • 2 eggs well beaten
Put the bread in the skillet, pan or dish. Dot with 2 Tablespoons butter. Bake for 1 hour.
Cool and turn out or serve from the pan.

It will be served with strawberries.

How are you celebrating?

Later tonight, we'll enjoy this roast. Which spent the night soaking in herbs and Guinness!


More on that later.

Happy St. Patrick's Day to you.

Sunday, March 13, 2011

Sunday Dinner and Monday Meals

For Sunday Dinner tonight we had mini-turkey meat loaves, cooked in muffin tins.  We rounded things out with garlic mashers and steamed broccoli and carrots.  My kids LOVED this dinner.  Even the girl who usually only eats fruits and veggies.
The mini meat loaves were inspired by a recipe in this adorable cookbook.  Rae Grant of My Little Hen knows kids... she knows what they like to eat, what they like to cook, and even what they like to craft too.  I turned to her cookbook for inspiration and recipes for a few different items on our meal plan.
So here we are... some pretty basic stuff.  We have a lot of comfort food and soups on the menu as we slowly ease into spring.  The hubby will be out of town for a bit so I like to stick with things the kids will really like and stuff that is pretty easy to prepare.  I did a big bread bake yesterday and we are already through a loaf and a half.  Oops!  Here is my favorite honey whole wheat bread recipe.  (For a bigger view of the meal plan, just click on the photo.)

What is on your menu for the next week or two?

Saturday, March 12, 2011

Swiss Chard Saturday Night

Sometimes, for me, cooking is all inspiration.

My darling friend had some extra Rainbow Chard on her hands and gave it too me. You may not feel the same way, but with all the color, it was feeling like Christmas!

I brought it into the kitchen thinking about a light dinner and before I knew it the chard was in a light wine sauce with some chicken Italian Sausage, pasta and a touch of Pecorino Reggiano.

Dinner was mild, light and easy on the eyes.

Here's how:

Recipe

1 Clove Elephant Garlic - minced
2 Tablespoons Olive Oil
1 Cup Chicken Stock
1/2 Cup white cooking wine or Vermouth
1 Teaspoon salt (or to taste)
5 Chicken Italian Sausages sliced
One bunch Rainbow Chard - cleaned, dried, stems cut in bite sized pieces and separated from the leaves, leaves cut or torn into pieces
2 Cups cooked pasta
1 Tablespoon Butter
Pecorino Reggiano Cheese or Parmesian

1) Pour Olive Oil into pan and heat on low.


2) Add minced Elephant Garlic (this is a very mild flavored garlic, almost in the onion to leek flavor group). Saute on low until translucent.


3) Add Chicken Stock, (or Broth) and wine and cook over a low simmer to reduce.

4) Add chopped chard stems and cook 5 minutes.

5) Add chopped chicken Italian Sausage and continue to cook on low for 10 minutes.

6) Add the remaining chard leaves and cook, covered on low for about 5 minutes.
7) Add 1 Tablespoon butter and toss with about 2 cups of fresh, hot pasta. I used penne.
8) Plate and top with the Pecorino Reggianno.
Bon Appetit!

Friday, March 11, 2011

What? Brownies in the Crock Pot! This, you gotta try!

OK, this has some sweet aroma appeal along with the ready-when-you-are that Crock Pot's bring.
Cook on low for 3 1/2 hours for a rich, delightful twist on a favorite desert!
This new favorite was derived from my favorite cooking publication-EVERYDAY FOOD


Here are the ingredients in order of appearance:
1 stick of soft butter, cubed
1 1/2 oz. bittersweet baking chocolate, chopped
12 oz. semi sweet chocolate chips
1 cup sugar
-cook these over low heat on the stove until melted

-add 3 eggs (lightly beaten) followed by mixture this pre-whisked mixture:
1 1/4 cups of flour
1/2 tsp sea salt
3/4 tsp baking powder
1/4 cup unsweetened coco powder

Fold all ingredients together and transfer to slow cooker for molten chocolaty fun!
Once the 3 1/2 hours is done, let cool to taste and scoop right out of the pot to enjoy!


Wednesday, March 9, 2011

Let's Talk CSA


We just sent in our contract for this year's CSA share and I am so jazzed!  In Minnesota we have a short growing season and our deliveries won't start until late June but I don't mind daydreaming and menu planning for a while.

CSA stands for Community Supported Agriculture.  This is a great way to get fresh, local, in-season produce onto your dinner (and breakfast and lunch) table.  Many CSAs offer other products such as meats, dairy, eggs, herbs, and flowers.

The website Local Harvest is a wealth of information about CSAs as well as a place to find a CSA farm near you if you are interested.
Over the last 20 years, Community Supported Agriculture (CSA) has become a popular way for consumers to buy local, seasonal food directly from a farmer. Here are the basics: a farmer offers a certain number of "shares" to the public. Typically the share consists of a box of vegetables, but other farm products may be included. Interested consumers purchase a share (aka a "membership" or a "subscription") and in return receive a box (bag, basket) of seasonal produce each week throughout the farming season.

What I love about being a member of a CSA farm is that I know my growers.  I get to visit the farm and help out if I want to.  I know that my family is getting the highest quality food.  We eat tons more fresh veggies than we would otherwise.  My kids know the names of dozens of different vegetables and eagerly try most of them, often while we are still in the red wagon on our walk home from our neighborhood dropsite.  My children also know where their food comes from and how it grows.

Here are a few sites to check out for recipes using CSA produce:

So tell us, do you belong to a CSA?  Which one?  Why do you love it?  Are you thinking of joining a CSA?  Do you have questions?

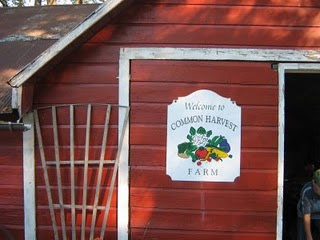
My favorite poem just so happens to be painted on the side of the barn at our CSA.  LOVE!

Tuesday, March 8, 2011

Shrove Tuesday Pancakes or simply Irish Pancakes


The Odlum's guide to homebaking was a cookbook my mom used when I was a kid growing up in Dublin. I don't think she needed to use it very often, but it was a familiar little book around the kitchen with it's old brown paper cover and the Odlum's Owl on the front, the price tag - 2 shillings and 6 pence.

On Shrove Tuesday every year our mom would make Irish Pancakes for dinner. They were only served on this one day every year, the day before Lent. My brother John and I would eat one hot pancake after another until we were stuffed. Several years ago I decide to introduce this Irish tradition to my own family in California. The first time I decided to make the pancakes I pulled the thin little Odlum's cook book off the shelf and there on page 30 was the magical little recipe I needed. I hadn't tried them myself in years, but I remembered well the smell of them cooking and the warm sugary, lemony, buttery juice dripping down my hands as a kid and I couldn't wait to experience it all over again.

What is Shrove Tuesday you might ask. For those of you who don't know, Shrove (confess) Tuesday falls on the day before Ash Wednesday in the Christian tradition. It's the day before Lent which is a time of abstinence or giving up. Pancakes are eaten on this day because they contain fat, butter and eggs which were traditionally forbidden during Lent. Of course we don't eat them for that reason anymore...shhh. We eat them because they taste so good.

Irish Pancakes
You'll need:

8ozs. All purpose flour
2 eggs
1 pint milk
1/2 level teaspoon salt
3 - 4 ozs. butter for cooking and serving
3 - 4 ozs. sugar for serving
2 - 3 organic lemons cut into wedges for serving

Method: To make pancake batter easily, first sift the flour with the salt into a bowl. This will help to produce a batter that is smooth and free from lumps, lumps are no good in Irish pancakes, just like lumps in Irish mashed potatoes aren't good either, but that's another story. Beat the eggs and milk together in a separate bowl. Make a well in the center of the flour and very gradually add the liquid to the flour a little at a time, this is very important, stirring and beating as you add the liquid until a smooth batter is made and all the flour and liquid are incorporated. The recipe suggests letting the batter stand for an hour (I usually don't have time for this, when we are ready for Irish pancakes we want them NOW). Pour the batter into a jug from which it can be poured easily on to the pan.

Cooking: Prepare a medium size pan by melting a little of the butter on the pan over medium to high heat (my mom would take a paper towel and wipe up excess melted butter, leaving a thin layer of butter, just enough so the pancake wouldn't stick to the pan). Pour a thin covering of the batter, just enough to run over the bottom of the pan. Cook quickly for less than half a minute over a good heat (long slow cooking will make pancakes very tough). Loosen the pancake and flip it over to cook the other side for another half minute.
Serve immediately.

Serving it up and dressing it to eat: Immediately serve the cooked pancake on a warmed plate. Add a little dab of butter, which will melt on the hot pancake, spread the butter with a knife. Immediately sprinkle sugar over the buttery pancake and squeeze the juice of a wedge of lemon. Roll the pancake into a long thin roll, cut in half and eat immediately preferably over your plate so that you can catch the lemony, sugary, buttery juices which can be absorbed with your next serving. ENJOY!

Saturday, March 5, 2011

Warm Chick Pea Stew - 7 Meals for under $15


My challenge in the 7 Meals Under $15 was the Warm Chickpea Stew. The first time I tasted chickpea stew was at Gjelina on Abbot Kinney in Venice, and as a thick vegetarian stew goes that was rated very high on my yummy radar. Then I decided to take gluten out of my diet and I couldn't eat the Gjelina's stew because there's couscous in it. When I saw this recipe I jumped at the chance to make it gluten free, this recipe has brown rice instead of couscous.

It was a beautiful morning this morning in Topanga. I woke up early and after a little breakfast I felt inspired to make the stew. I had all the ingredients at my fingertips. In my usual way, I altered the recipe just slightly to match my own particular taste, but not too much because I wanted to stick as closely as possible to the original recipe.

While I was chopping and prepping and thinking about how fun this blog thing is, my phone rang and it was the wonderful Vicki herself, perfect timing, since she's the reason I'm blogging these days. Vicki and I chatted through most of my preparation and cooking, with Vicki on speaker on the kitchen counter while I chopped and stirred. (It's a fun way to cook!)

Here's the recipe, enjoy!

Warm Chickpea Stew
Prep time: 15 mins
Total time: 75 mins
Serves: 8

1 1/2 Tbsp Olive Oil
1 1/2 cup diced onions (2 medium onions)
3/4 cup diced celery (2 stalks)
2 diced medium carrots (carrots were not in the orig. recipe, I added them)
2 tsp ground ginger
2 tsp turmeric
1/2 tsp ground black pepper
1 tsp ground cinnamon
1/2 tsp ground nutmeg
1 (28 oz) can organic diced tomatoes and their juices
3 cups organic vegetable stock (the orig recipe called for chicken stock, I prefer vegetable stock) [note: if store bought, buy low sodium]
20 oz can of organic chickpeas, rinsed
14 oz can of organic lentils, rinsed
1/2 cup short grain brown rice
3/4 tsp salt
2 tsp fresh organic lemon juice
1/2 cup chopped fresh cilantro leaves (I used 6 fresh basil leaves instead)
1 bayleaf (I added this to the recipe)

Heat the olive oil in a medium stock pot or Dutch oven over medium-high heat. Add the diced onions, celery and carrots and cook for approx. 4 minutes. Add the ginger, turmeric, pepper, cinnamon and nutmeg. Cook, stirring constantly for about 1 minute. Add the tomatoes and their juices, stirring well. Add the vegetable stock, lentils and chickpeas. Bring to a boil.

Add the rice and salt and lower the stew to a simmer. Cook covered for 60 minutes or until the rice is tender. Add the basil leaves and lemon juice, continue to cook for a couple more minutes. Serve in warmed soup bowls, you can garnish with fresh cilantro sprigs if you wish.

When I served the stew for lunch today I served it warm and not hot, so we could really enjoy all the delicious spices. It was a perfect Saturday lunch, but I would serve it anytime. ENJOY!

Joan's notes: This was a quick and easy recipe and within an hour we were enjoying a bowl of yummy nutritious stew. Next time I will crumble a mild goat cheese on top when serving the stew. While I was chatting with Vicki this morning I challenged myself next time to cook the chickpeas and lentils from scratch rather than using canned ingredients, this will add to the cooking time of course, but these can easily be cooked the day before and refrigerated until I need them. I rinsed both the lentils and chickpeas under cold water which removed some of the sodium added in the canning process, but I am curious to know how different this stew will be with home cooked ingredients.

Till next time.


Friday, March 4, 2011

Quick and Yummy Sloppy Joe's


[side note] I seem to be having hot sandwich cravings during our not-as-sunny-as-usual winter in California. ;-)

A hot sandwich is perfect for those nights (quite a few actually in my house) where I need to get dinner on the table fast! One of my favorite "Go To" dishes is good ol' hearty Sloppy Joes. Tuesday was one of those days, so I got my hands on a Sloopy Joes season packet (yes sometimes season packs can be your BF in a pinch) and followed the directions which were as follows:

ingredients:
1 Lb ground beef (I like ground turkey just as much, though it it cooks up finer)
1 Sloppy Joe season packet
1 4oz can of Tomato paste
1 cup of water
6 rolls, Kaiser, Ciabatta, French or other

saute ground beef in a pan then drain and add water, season pack, tomato paste and let simmer per package directions.

In the meantime toast the buns in the broiler for a few minutes then, add sloppy joe meat to open roll, garnish with grated mozzarella and serve-yum!

Thursday, March 3, 2011

A Quick Side: Wild Rice

Tonight, I know there will be chicken on my Grill-A-Vator. (Yup, I have the amazing O'Keefe and Merritt with a working broiler.) And right next to it will be a delicious salad with Easter Egg radishes, avocado and my favorite Dijon Vinaigrette along with Wild Rice.  

Wild Rice is such a great side dish. It's actually a grass more than a grain. A grainy grass. Trader Joe's has a Fully Cooked and ready-to-eat pack that serves well when you want to eat beautifully by compiling great ingredients but don't have the luxury of slow cooking. You won't find microwave instructions here either. Not on my radar.

Wild Rice And:
1 package Trader Joe's fully-cooked Wild Rice.
2 Tablespoons EV Olive Oil
1 cup diced red onion
1/2 cup diced scallions
Salt (your choice)
Fresh Ground Pepper
Lemon juice (optional, but yummy)

Heat olive oil in a skillet over medium flame. Add red onion, cook until translucent. Toss in Trader Joe's Wild Rice. Cook on medium for about 10 minutes. Add scallions. Cook 5 to 10 minutes, to wilt the scallions. Salt and pepper to taste. Squeeze the juice of 1/4 lemon. Serve. 20 minutes max cooking time.

Variation inspiration:
- Add garlic salt
- Start with onion and minced garlic
- Without garlic and scallions add 1 cup chopped fresh or canned peaches
- Add chopped celery
- Add brown rice, butter, feta cheese, cilantro, fresh tomato, herbs, herbs, herbs

Tuesday, March 1, 2011

Cooking with: A New Pan - Ice Cream Sandwich Pans

I'm all for checking out a new utensil or pan. It seems Sur La Table has a bunch of new pans, a doughnut twist pan (I think of them as fried though, not baked) and this dreamy Ice Cream Sandwich Pan. I see a recipe book in the left background, but, I might need to have a few good recipes for this now! 

It might be too cold for ice cream sandwiches today, even on the Southern California coast, but spring is around the corner.

So, how about this? Send us your recipe, we'll dig through our files and we'll spend the last week of March celebrating Ice Cream Sandwich week! Could be a fun way to tuck away some summer recipes before the heat and busy joy overtakes us and we end up looking for the ice cream truck!

What do you think? Leave us a comment so we know you're in! And just maybe we'll have a fun giveaway to go with it.

Check back!