Showing posts with label Vicki. Show all posts

Tuesday, October 23, 2012

Let's talk about Apples: Pink Pearl

Look at this beauty.

The Pink Pearl is a wonderful, wonderful heirloom apple with a pretty pearly exterior and look, a pink, stripy interior with a tart, crisp bite.

The apple is said to make a pink applesauce. And I can see why. But, I only have two, and when I cut into the first one, it was gone in a flash!

What's not to love? Flavor, texture and the really, the perfect introduction to apple season.

A group of friends and I head up to Riley's Farm in the southern California apple country in Oak Glen this time each year. I don't get to go so, I'm all the more grateful for these babies.

The lovely people at Frieda's tell me that our local Sprouts Market will have lots of heirloom apples coming our way. I have two favorites. The amazing Arkansas Black apple and the Mutzu. So I'm ready to expand my repertoire and see what flavors and textures are coming my way.

Tomorrow or so? King David.

What's your favorite apple?


Friday, July 20, 2012

A Hello Kitty Cake


Hello Kitty!

Well I have to start with this:  My going-into-8th-grader decided she (who loves math) wasn't going to spend a whole year in pre-Algebra when she gets it. So she plopped a stack of papers down for me to enroll her in a four week concentrated pre-Algebra course at the nearby all girl Catholic high school. Where they were uniforms every day in summer. With saddle shoes. 

Really?

Well, it went very well. She loves her very fun, young teacher so much she wanted to make her a Hello Kitty Birthday Cake for the party today. As they review yesterday's final. 

Really?

It's all quite good and wonderful and don't you think cake is a great way to finish summer school?

We made this easy by downloading a picture of darling Hello Kitty, making a white on white cake (teacher's favorite) and decorating with rolled fondant. Fondant can be difficult. We had a few challenges, but all in all, my girl stepped in rather fearlessly to decorate and I'm quite thrilled with her outcome.

Care for a bite?

Friday, March 2, 2012

Quick Apple Dumplings


Well, there's your picture. It happened before I got back to the kitchen this morning. 8 dumplings. 2 kiddos. 1 Dear Husband.

Ta da.
Poof.
Gone.

Here's the recipe and I believe you'll love it!
Set the oven at 350.

You'll need:
2 apples - Granny Smith are fine, I like Jazz
1/2 stick butter
2 Tablespoons sugar
1 container refrigerated crescent rolls

Cut the apples in quarters, skin on and core them.
Wrap the apples in the crescent roll strips and place them in a greased 8x8 baking pan.
Melt butter and sugar and whisk together lightly.
Pour over the wrapped apples and bake for 35 minutes at 350 degrees.

Breakfast? Dessert? Kiddo's snack? Just enjoy.

Thursday, March 1, 2012

Chicken Broth update

Ok, I went and got the chicken.
But I went to Whole Foods (but not this one in Austin, Texas).


I became distracted by beautiful kales


Purple cauliflower


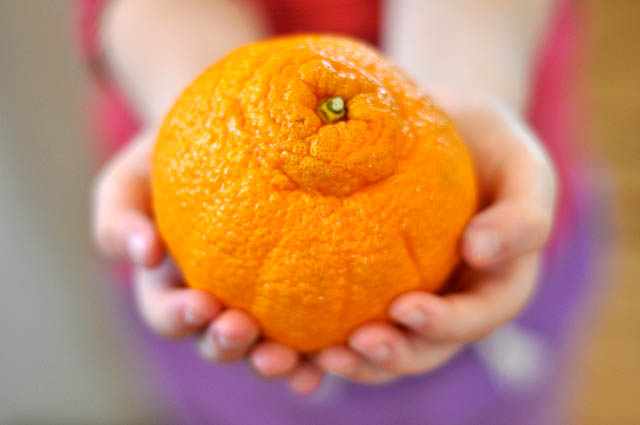
Sumo Mandarins


And the salad bar. 

Ai, ai, ai! My daughter and I spent over an hour looking and touching and dreaming. I grabbed some whey protein for morning smoothies and shocked my girl when I showed her the spinach I'd be adding. She's still recovering.

So, yes, we bought the chicken. But with the salad bar, right near the cold case where I picked up some cold roasted brussels sprouts (I promise, both my grandmothers are rolling over in their graves.) I acquiesced immediately to my girlie's request for their rotisserie chicken. Dinner? Done!

Last night I finally got to the Chicken Broth and I'll say this. It is worthy of some time. I roasted the chicken in the dutch oven as Chef John suggested, but I'm finicky about the breast meat coming up to 160 degrees. It took a bit longer than 45 minutes. Do temperature test the chicken when you try this. 

Then, after the stove top caramelizing and about one hour of simmering, I gave up for the night and put it in the refrigerator to wait. (I did cool it first.) So more on that later. The fragrance is superb and I can't wait to finish it tonight for chicken soup. 

I promise, we'll report on it when it's finally complete. Chef John's recipe is a keeper, or at least seems so for now. What I love over and over about his point of view is this, more of the chicken, less of the extras. This recipe doesn't want you to add anything to the broth as you go but one celery stalk, one onion and three little bruised garlic cloves.

It took a lot not to let my Dear have a spoonful. Mais non! It is not ready for tasting.

To be continued.

Til then, 
Vicki


Monday, January 2, 2012

Kale Salad, again

Kale Salad for breakfast.
The Kale Salad recipe with berries and a whole pomegranate, raisins and nuts and Oh! La! La!

We loved this at our New Year's Brunch.

Saturday, December 31, 2011

Thinking about food

So much in the blog-o-sphere is about the thing I made and my recipe. It's what we do here at What Am I Cooking Central, of course. But what about the conversations about food? The things we learn to do, the things we love about cooking, the Essence of Eats?

My friend Mary and I sit and talk about vegetables and crops of apples and the differences in flavors and bite the way the wine friends talk about wine varietals. Now, her job, her J-O-B, the thing she's paid to do each week, is think about and learn about what's happening in food and specifically, in the biggest Farmer's Market on the left coast. But we talk about it all (and have for years) because we just enjoy it. It's more than what we're throwing together to feed a clan. There's the joy in it that gave Mrs. Rombauer the idea for the title of the book, we can depend on, JOY OF COOKING.  (It's historical. I laugh when I see the book's spine through the glass door of kitchen book space - thinking of how in Julie & Julia, Julia Child called her, "Mrs. Joy.")

I also spend time with Marjorie talking about food ideas and on Christmas day as we were eating the Tater Tot casserole Janet brought to the breakfast gathering, we were secretly trying to sleuth out the ingredients. (The recipe has been long illusive to us, though we've asked. It is a favorite at the gathering and, I thought I understood why you might keep it close.) Not long after we finished quietly throwing ideas around, "cream cheese and sour cream, nutmeg?" she came and apologized for forgetting to share it with me. She really forgot I wanted it. (I think she took pity on me, thankfully. My two kids would eat the whole pan, given the option.) And it turns out it's an Emeril Lagasse recipe. Mine all mine! You can find it here: Kicked Up Mac and Cheese.

See what we do when we talk about it? It. The deliciousness and fun we have compiling? I learned how to seed a pomegranate over at Food Wishes this week with no blood and no purple fingers and was on the phone with my mom within minutes to share the fun. She immediately went after two she had on her counter and called back almost giddy with delight. She'd seeded two pomegranates in 20 minutes rather than the 30 it usually takes her for one. We laughed and asked each other what took us so long to learn this over and over as she shared her amazement.

Food is fun. Yesterday, following my son's amazing presentation of Chicken and Mushrooms, my girlie spent time on line and found recipes for Shrimp Fettucini Alfredo, a Caesar where you keep the Romaine leaf whole and an apple cake dessert. She wants to feed us for New Year's Eve.  I'm all for it.

Let's keep the fun of all the Christmas holiday cooking (and the time to plan, create and share) in our hearts as this New Year arrives. And let's plan to offer what we enjoy in the conversation and the recipe sharing all year through.

Happy New Year to you. And Bon Appetite!

Thursday, December 29, 2011

Chicken & Mushrooms. Done!

We did it. And when I say we I mean my 15 year old son was at the helm.
We made this: just chicken and mushrooms.

The meal is really simple with a little bit of finesse. Chicken breasts down to sear, flip, continue, add mushrooms, move to the oven, remove breasts, cook on the stovetop, deglaze with water, cook down and serve.

Oh my.

No original pics today, the boy needed his sous chef! (This is from foodwishes, you need to see this fabulous site.)


We served these alongside sweet potatoes( baked at 400 for almost 90 minutes) and a miners leaf salad with just olive oil and tomato vinegar. Yum.

Do try.

Tuesday, December 27, 2011

Chicken & Mushrooms

This is what I'll be doing today. Through Dorie Greenspan's blog I happened on to the genius of Chef John at Food Wishes.

I vote we all just cook this today and call each other to discuss!

Enjoy.

Thursday, December 22, 2011

Cream Cheese Ice Box Cookies - Joy of Cooking

These are truly the perfect Christmas Cookies.


I'm going to go make some, roll them out and let the decorating begin! Join me?


About forty-two 21⁄4-inch cookies
Whisk together:
   2 cups all-purpose flour
   ½ teaspoon baking powder
   1/8 teaspoon baking soda
   ½ teaspoon salt

Beat in a large bowl until fluffy:
   11 tablespoons unsalted butter, softened
   3 ounces cream cheese, softened
   1 cup sugar

Beat in:
   1 large egg
   1 teaspoon vanilla
   (¼ teaspoon finely grated lemon zest)
   (Decorative sugar, cinnamon sugar, or nonpareils)

Stir in the flour mixture until blended. Refrigerate until slightly firm, about 1 hour. Shape the dough into a 12-inch log. Refrigerate or freeze until very firm. Preheat the oven to 375°F. Grease or line 2 cookie sheets. Cut the log into 3/16-inch-thick slices and arrange about 2 inches apart on the cookie sheets. Before baking, sprinkle the tops with:
   (Decorative sugar, cinnamon sugar, or nonpareils)
Bake, 1 sheet at time, until the cookies are browned at the edges, 10 to 12 minutes. Let stand briefly. Then remove to a rack to cool.

Oh, we thank you Irma Rombauer and Joy of Cooking.

Christmas Cookies!


Let's go!

1 1/2 cups all purpose flour
1/4 teaspoon salt
1/2 teaspoon baking soda
1/2 cup unsalted butter, room temperature
1/2 cup granulated white sugar
1 large egg beaten
1 teaspoon pure vanilla extract

Cookies
In a separate bowl whisk together the flour, salt and baking soda. Set aside. (No mention of a sifter here.)

In the bowl of your electric mixer (or with a hand mixer), beat the butter and sugar until light and fluffy (about 3-4 minutes). Add the beaten egg and vanilla mixture and beat until you have a smooth dough. Wrap the dough in plastic wrap and refrigerate for about one hour (or overnight) or until firm enough to roll.

Preheat oven to 350 degrees F and place rack in the center of the oven. Line two baking sheets with parchment paper.

Remove the chilled dough from the refrigerator and, on a lightly floured surface, roll out the dough to a thickness of 1/4 inch. Keep turning the dough as you roll, making sure the dough does not stick to the counter. Cur out shapes using a lightly floured cookie cutter and transfer cookies to the prepared baking sheet. Place the baking sheets with the unbaked cookies in the refrigerator for 10 to 15 minutes to chill the dough which prevents the cookies from spreading and losing their shapes while baking.

Note: if you are not going to frost the baked cookies, you may want to sprinkle the unbaked cookies with colored crystal or sparkling sugar.

Bake cookies for about 8-10 (depending on size) or until they are just beginning to brown around the edges. Remove from oven and let the cookies cool on the baking sheet for a few minutes before transferring to a wire rack to finish cooling. Frost with royal icing and sparkling sugar, if desired. Be sure to let the royal icing dry completely before storing. (This may take several hours.)

Frosted cookies will keep several days in an airtight container. Store between layers of parchment paper or wax paper.
Makes about 20 - 3 inch cookies.

For Royal Icing with Egg Whites:
1 large egg white
1 teaspoon fresh lemon juice
1 1/2 cups confectioners (powdered or icing) sugar, sifted

In the bowl of your electric mixer (or with a hand mixer), beat the egg white with the lemon juice. Add the sifted powdered sugar and beat on low speed until combined and smooth. The icing needs to be used immediately or transferred to an airtight container as royal icing hardens when exposed to air. Cover with plastic wrap when not in use.

Thanks to Joy of Baking
Picture courtesy: sodahead.com 

Wednesday, November 30, 2011

Warren Pears - coming soon!

I'm not really a coming soon gal. More a "hey! look what we did!" gal. But I've been hearing so much about the Warren pear found here from Frog Hollow Farm.

Isn't it beautiful with that blushing cheek?

Don't buy them just yet, they may be coming to a market near you.
I'm tasting tonight and will report!

Oh joy!
There is nothing like the fragrance of a winter's pear.

Tuesday, October 4, 2011

You know you're busy when:

...your husband says, "Dear, you haven't posted anything since the potatoes. I know we've eaten."

Hmmm.

Friday, September 23, 2011

Delightful Little Potatoes

These little guys found their way into my kitchen and I'm so glad they did.

These Piccolo potatoes are from The Little Potato Company. And they are all they promise to be.
-  Quick to cook
-  No need to peel
-  I wash 'em anyway, but you don't have to.

I remember the first Yukon Gold potato I ever tasted. It brought to mind Grandma Edith's point of view. All a perfectly boiled potato needs is a little butter, salt and pepper. Yukon's took that idea to a new level and so do these delightful babies. They are full of flavor. So in preparing I didn't want to so so far as oven roasting with rosemary. Just wanted to see how they stood on their own - with just a little delicate enhancement. They are stars!

As dinner, right next to some tasty sliced sirloin, they performed brilliantly.
I started with about 1 Tablespoon of good olive oil in a pan and let it warm to high and popped in the potatoes whole.


Once in the pan, I reduced the heat to medium high and watched them for a bit and then covered them.


At about the 10 minute mark, I tossed in a handful of garden cherry-sized tomatoes.


Then, just before serving, I finished with a spot of butter.


And some fresh chopped tarragon - and salt and freshly ground pepper.


The flavor is delightful -- the tomatoes (I mixed cherry toms and some baby heirlooms) little sweet with a hint of tang. I suggest you try them soon. With the cherry tomatoes, they make a nice bridge from summer to fall.

A couple of tips? After piercing with a fork to test a couple of the bigger ones, I simply cut them in half (to fit in with their friends).


The potatoes can be found at Ralph's Fresh Fare. I say, go get 'em.

Saturday, September 17, 2011

Dinner on a Bread Slice

With fall advancing, here's an easy one with great results and it comes right out of Mom's 1960's kitchen.

Dinner on a Bread Slice
  • One wide loaf French Bread (usually sold in the market bakery, no skinny baguettes) one or two days old cut horizontally
  • 2 pounds ground beef 
  • 1 egg
  • 1 package Lipton Onion Soup Mix
  • 2 cups shredded sharp cheddar cheese
Set your conventional oven to 350 degrees.
Cut the bread horizontally and place them on aluminum foil wide enough to completely cover them for cooking. (We never seem to have the wide aluminum foil, so I cut two lengths for each half and fold it together to produce a big enough piece.) Set aside.

In a large bowl, mix the ground beef, egg and soup mix.

Top the bread with equal parts of the beef mixture.
Sprinkle with equal parts cheese.

Cover with foil.

Place both on a cookie sheet and bake at 350 for 45-50 minutes.

My mom always froze the second cooked loaf for reheating later. You can also freeze the second loaf before cooking, but please allow defrosting time before you bake it if you choose this route.

It's rather perfect for Sunday supper with soup too.

Try it. And tell us what you think!


Wednesday, September 14, 2011

A last word on Hatch Chilis

Just like the summer slow and busy life is over, the Hatch Chilis are just about gone. 

When last we met we were talking about tasty Hatch Chilis, weren't we?  Before we break out the pumpkin soup and the chai lattes, here are a few things we learned on our Hatch Chili adventure first: they are chilis. I've learned to think of Hatch Chili season as the season of Chili opportunity, not the harvest season for one species of chili pepper. Here we go:
  • These long green chilis are all grown in one place, Hatch New Mexico. Hatch is not really the name of a specific variety of chili, more a range within a type of chili  (that would be long green)
  • When I talked to one of my friends, she shared that she buys and roasts four pounds of Hatch Chilis each year, freezes them and uses them in all the recipes that call for chili
  • Then I talked to another friend and: well, ditto
  • Because they aren't all from the same chili variety, they're going to range in heat level - taste and divide as appropriate if you're using now or freezing
  • And apparently, the variation in heat is just part of being a chili (my brilliant fruits and veggies officiando friend tells me the variation has much to do with the stress a plant endures as the chilis are forming. Hmmmm. The become hotheads when they're stressed? I love these chilis all the more.)
  • When you roast, you can freeze them with skin on. The skin slides off more easily from the frozen state
  • You'll never have to buy a can of Ortega Chili again. (Fresh is my favorite! And Fresh/Frozen is the next best.) This should bring me to a great recipe for chili rice and it very likely will in the week to come. 
Now I'm waiting for August like it's Chili Christmas!

Monday, August 29, 2011

Hatch Chilis: First, we try salsa.

Well, it's Hatch Chili season & I've been playing around with the fun little chili from Hatch, New Mexico in my California kitchen. Here are the first things I learned:
  • Wash your hands
  • Wash your hands
  • Don't touch your face, (don't wipe your brow)
  • And, wash your hands
Yikes! The oil in these babies is hot. I also note cooking with the Hatch Chili can be a little like playing Craps. You simply can''t predict the outcome. First, I taste a nice and mild one then a scorcher. Well, at least I'm clear on what I'm up against.  I stopped by my neighborhood specialty grocer for well, a specialty item, and they were having a Hatch Chili fest. They roast, you buy and even they were separating the hot from the mild as they tasted them! I'd prefer to roast them myself -  that's another post and it's coming.

The first attempt at Casa del My House, was Roasted Hatch Chili Salsa:

I sweated onions, roasted tomatoes and Hatch Chilis and combined them with salt and a garlic clove in the food processor.

Easy and tasty.

Next time, I'll go for Roma tomatoes, the big cherry tomatoes from my garden are yummy, but a little sweet. The salsa was a bigger hit day 2 than day 1. But, isn't it always?

Click here for the recipe.


Just a spot of lime juice along with the salt was a great idea. And voila!


Monday, July 18, 2011

Spanish Eggs from the Sonoma Diet

This is one of my favorite Saturday morning recipes for tender and delicious eggs.

My husband really enjoys these and every once in a while I get them in the pan before my daughter requests Daddy's soul food: bagels.

They are very rich in a simple flavor.

Printable recipe
1 yellow pepper, cut into thin bite-sized strips
1 fresh jalapeno chile pepper, seeded and chopped
2 cloves garlic, minced
1 Tablespoon extra-virgin olive oil
1 1/2 pounds Roma tomatoes, seeded and chopped
1 teaspoon chili powder
1/2 teaspoon ground cumin
1/4 teaspoon kosher salt
4 eggs
Kosher salt
Freshly ground black pepper
2 Tablespoons sliced almonds, toasted

1) In a large skillet cook bell pepper, jalapeno pepper, and garlic in hot oil about 2 minutes or until tender. Stir in tomates, chili powder, cumin, and the 1/4 teaspoon kosher salt. Bring to boiling: reduce heat. Cover and simmer for 5 minutes.
2) Break one of the eggs into a measuring cup. Carefully slide the egg into simmering tomato mixture. Repeat with remaining eggs. Sprinkle eggs lightly with aditional kosher slat and black peper.
3) Cook, covered, over medium-low heat for 4 to 5 minues or until whites are completely set and yolks begin to thicken but are not firm.
4) To serve, transfer eggs to serving plates with a slotted spoon. Stir tomato mixture; spoon around eggs on plates. Sprinkle with toasted almonds.

When you cut the jalapenos, wash your hands with soap and for heaven's sake, don't touch your eyes!

Thursday, July 14, 2011

Bechamel -- In Honor of Bastille Day

We should be dining of the delicious foods of France tonight, but I had a left-over steak salad from Chipotle and a slice of rare Filet Mignon waiting for me. Neither a Croque Monsieur or Croque Madam could keep me from that deliciousness. So, with nothing to show for the day, I offer:

A Bechamel Recipe
Printable Recipe

1 cup milk, scalded with a slice of onion, a bay leaf, a pinch of nutmeg, a couple of cloves, salt & pepper
Set aside so the flavors can mingle for 10-15 minutes
Make a roux of 1 1/2 Tablespoons of flour and 1 1/2 Tablespoons melted butter (heat until foaming)

When milk mixture is slightly cool, strain in the milk mixture and simmer, whisking for about 5 minutes.
For a thinner sauce, use 1 Tablespoon each flour and butter.

Use it in Macaroni & Cheese or any one of hundreds of uses for White Sauce. Or add parmesan and and a little tomato flesh for a nice pasta sauce.

And a bonus: my favorite Pate Sucre recipe (sweet tart dough - print it!).

And Viva la France!

Friday, July 8, 2011

Angelcots, glorious Angelcots

Last weekend I fell in love.

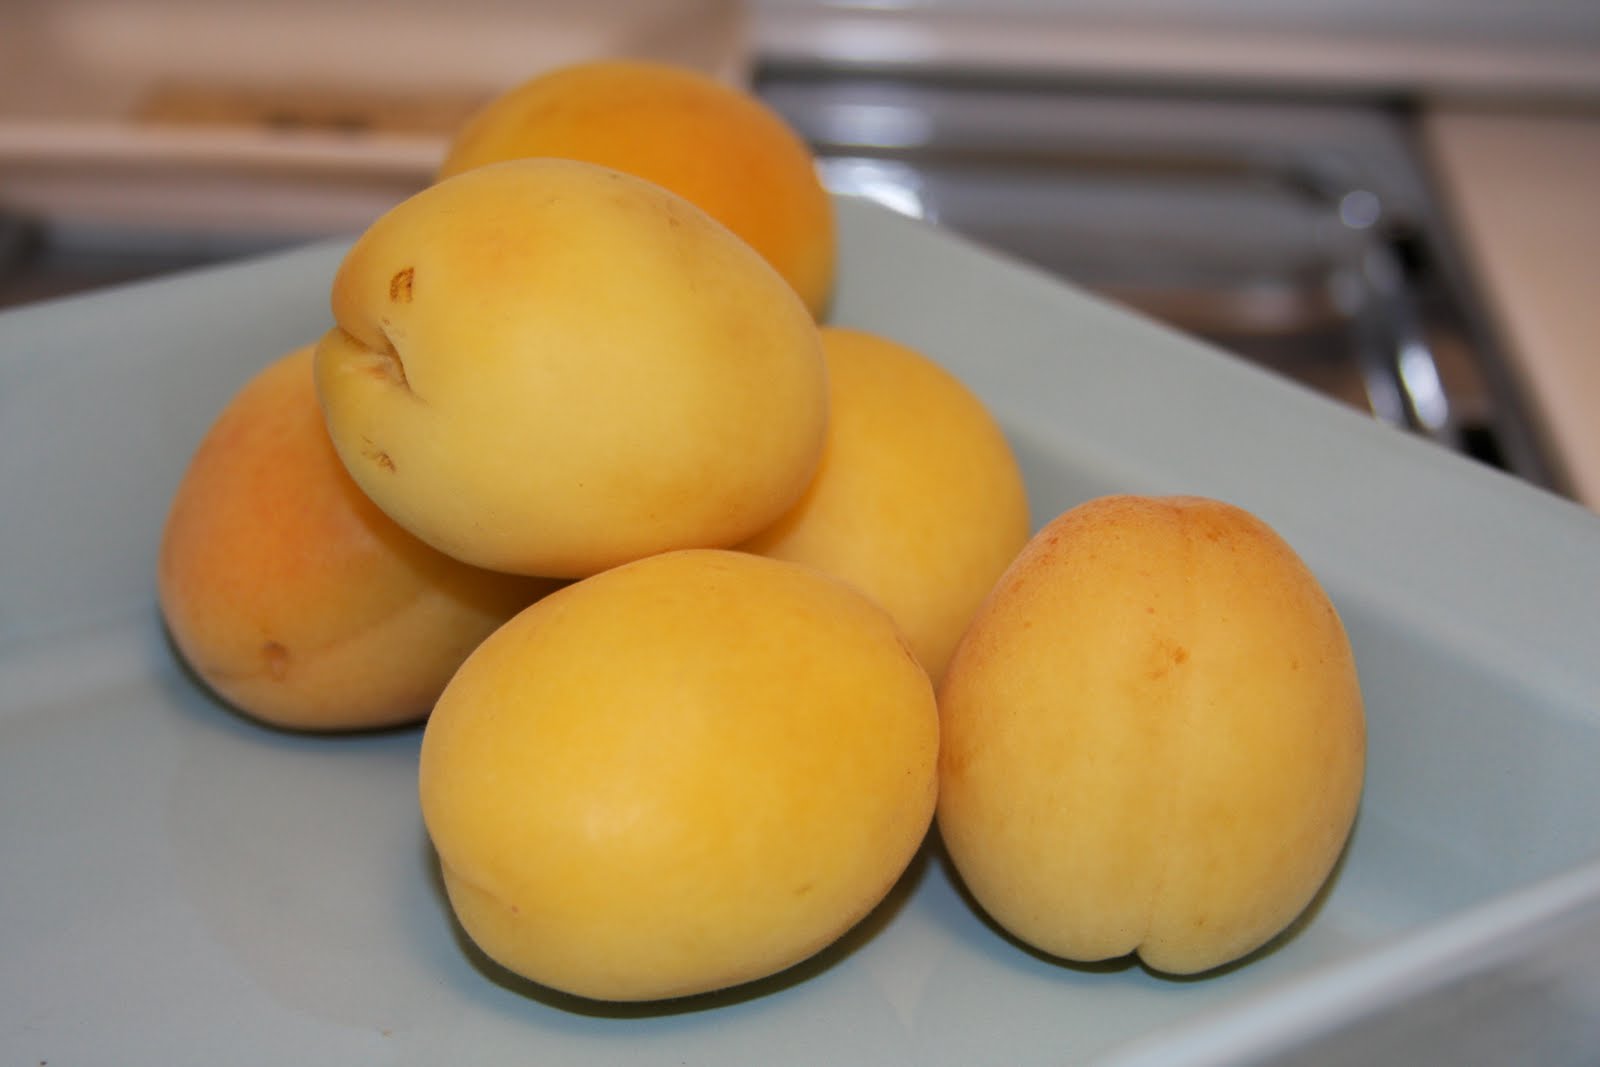
These beautiful, whiter fleshed apricots are called Angelcots. They'll be in your Trader Joe's or Ralph's markets very soon. We have Frieda's Specialty Produce to thank for bringing them from the world of farmers markets to selected grocers. (Just like the little kiwi, years ago.) They are magnificent.

These darlings are called Angelcots for a reason. They really are the angels of the apricot world. You know how many times you've encountered the fragrance of a ripening apricot only to find the flesh a bit flat or tart or worse, mealy? Well, not these delights. They are, somehow, sweet with a hint of tartness, almost buttery in consistency. And slightly reminiscent of the pear.

Frankly, if you like apricots, you should just buy a box and eat them as they are, as soon as they ripen (at room temperature). Here are a few ways I'll be enjoying them:
  • sliced and chilled
  • sliced in beverage
  • chopped in salad (with feta)
  • as dessert, halved and carefully peeled, with Marscapone cheese - maybe sweetened only a bit
  • with fresh, fresh blueberries
  • out of the bowl  - as God clearly intended
After I tasted them, my first thought was a simple tart. I wanted to poach them briefly -  a minute or so, (against all my instincts) just to remove the skin and impart a hint of orange peel. My instincts were right though. No poaching. In a quick minute they went from tart to Angelcot sauce. I barely had to stir them to have a luscious Angelcot Coulis. (Good for over the tart or over Vanilla Ice Cream.) Ah!

So with the remainder of my Angelcots, I went for a very simple compilation tart. It's fairly easy. Try it.

Angelcot Tart 
Printable Recipe

1 sheet frozen puffed pastry
1 cup Creme Fraiche
6 Angelcots, delicately peeled
Angelcot Coulis

1) Defrost the puffed pastry. And heat the oven as directed.

2) Trim the edges of the dough 1/2" and stack it along the side edges to make a border (you'll use this for lots of summer fruit tarts).

3) Give the edges a quick egg wash (ez: one egg & 1 Tablespoon of water, whisked)

4) Bake the pastry.

5) When it cools, brush the Creme Fraiche (mixed with 1 Tablespoon of superfine sugar) onto the the pastry bed. You can also use a thick greek vanilla yogurt or pastry cream. Pastry cream is my favorite, but this is a quick compilation and there will be another tart.

6) Cool covered in the fridge while you peel the Angelcots. (I use a tomato peeler like these - be careful.)

7) Cut the fruit into sixths and layer them as you like. They'd also be great in quarters or halves.


8) I used the coulis so no apricot jelly for me, but my French pastry counterparts will always brush fruit gel over any fruit pastry. Not this time, but if you try other fruit and want the finished, less rustic look, follow the recipe below.

And, enjoy.

Fruit Gel to Finish
Cup apricot preserves
2 Tablespoons water or liqueur like Grand Mariner
Heat and push through a stainer to remove fruit particles.

Blush over when slightly warm and allow to set. Fruit will hold it's freshness and shine beautifully.

Now, go buy some Angelcots.

My box is empty.


Thursday, June 16, 2011

Chicken - Simple and Yummy

No fancy cookbook is needed when Meredith, my coiffing gal is around. Besides a couple of highlights, coverage of some, um, gray paint at the scalp line and a great cut, she's dashing off kid friendly recipes.

So here it is: grab a big package of thighs and one of drumsticks. Make the marinade by mixing everything in a big ziplock bag, pour it over, pop it all in the oven and voila, in a Lipton Onion Soup Mix way.

My family loved the flavor - I finished it in the broiler for some tasty caramelizing.

Easy. Tasty. On the grill? What's not to love?