Showing posts with label Budget. Show all posts

Tuesday, February 21, 2012

Weekending: Easy Lemon Scones


This Sunday morning we decided to have "home church" as Truman calls it. I made scones and the kids set the table. Eric read us a devotion and we sang our prayers. It was actually quite lovely. We ended our home church with playdoh and sketchbooks. Which sometimes feels more church-like to me.



I found this recipe on epicurious, but I adapted it for what I had in the fridge, and what we had in the pantry. I cut down the lemon in the recipe to just a hint so I could mix in chocolate chips. Isabel, my daughter does not really enjoy scones, but she does enjoy them with chocolate. Personally, I enjoy my scones with a big dose of coffee. Don't you?
Easy Lemon Scones
  • 3 cups all purpose flour
  • 2 1/2 tsp. baking powder
  • 1/2 cup sugar
  • 1 1/2 sticks chilled unsalted butter, cubed
  • 1/2 cup mini chocolate chips
  • 1 cup milk
  • 1 tablespoon fresh lemon juice
  • 1 teaspoon of lemon zest
For top of scones:
  • 1 tsp melted butter
  • 1 enough sugar to lightly dust each scone

Position rack in top third of oven and preheat to 425°F. Line large baking sheet with parchment paper or a silpat. Whisk flour, baking powder and 1/2 cup sugar in large bowl. Using fingertips, rub in chilled butter until pieces are size of small peas.  Form a well into the dry ingredients.


Mix 1 cup milk, lemon juice and zested lemon peel in glass measuring cup. Pour buttermilk mixture into the well you created dry ingredients and stir until dough begins to form (some of flour will not be incorporated). Transfer dough to lightly floured work surface and gather together. Knead dough briefly, about 5 turns. Divide dough in half. Incorporate the mini chocolate chips into one half of the dough, do not need just incorporate. Form each dough half into ball and flatten into 1-inch-thick disk. Cut each disk into 6 wedges. 

Transfer scones to prepared baking sheet, spacing 1 inch apart.* Brush tops with 1 tablespoon butter and dust with sugar. Bake until scones are golden brown on top and toothpick inserted into center comes out clean, about 25 minutes.

*Note: I did not space mine apart enough and they all baked together. So if you want these to LOOK like scones, you probably should not be in a hurry and do that (:


--Mary


This week we're joining Amanda for Weekending, and Tasty Tuesday with 33 Shades of Green.  

Tuesday, February 7, 2012

Making Almond Milk


Last weekend, my husband was away on a business trip and my kids were both occupied: little man was washing all of his micro machines in warm water at the kitchen table. And little lady was drawing kitties and cutting them out of cardboard.

I could have cleaned or folded something, but instead. I decided to make almond milk. The night before I had left the slivered almonds in a dish of water to soak. And now, the easy part of blending and straining.

This was so easy. Though I'm sure a vita-mix and cheese cloth would have done better than my regular blender and fine mesh sieve.


I felt so self sufficent making my own. Though... in honesty, I do like the store bought kind better!
Almond Milk
1/2 cup almonds soaked in water over night
2 cups cold water
2 dates chopped
1 tsp honey (or more if you like sweeter)
1/2 tsp vanilla extract (real not imitation)
pinch of kosher salt


Strain the almonds from the soaking liquid and discard liquid. In a blender place the almonds, water, chopped dates, honey, vanilla and salt. Blend about 2 minutes on high speed. Strain through fine mesh sieve or 3-5 sheets of cheese cloth. Save the almond meal for another recipe. Shake well before serving. Keep refrigerated for 3-4 days.

I really like this almond milk in coffee (but leave the last sip of it or you'll get a mouth full of tiny almond pieces). It's also delicious on granola or in oatmeal. I don't like to drink any form of Almond milk straight up.

Enjoy this simple recipe. I hope you have fun making it!

--Mary

Friday, June 24, 2011

Making Pizza Pie


I've been making Trailer Gypsy's quick pizza crust for a while now... I needed a replacement for the little bags of chemicals and magic (ok it's just dry bagged pizza crust) that costs too much money but is SOOOO easy. And the other quick pizza crust recipes I've tried taste like moonsand. Moist and gritty. And that is not how I like my pizza.

And I can honestly say.... I love this recipe. No moonsand. Just smooth and crispy pizza. Quickly. Who says things can't be quick, cheap and good?

Plus, we make two thin crust pizzas. One with just cheese, chicken and broccoli for the kids. And one with everything for the grown-ups-- this one was three cheese, Manzanilla olives and fresh spinach. Pizza is so versatile for this time of year when gardens are producing, farmers markets are bursting and the CSA box is a treasure trove-- any veggie you can possibly imagine could probably be a topping!


I did monkey with it a little bit. Here's the original recipe.

And here is mine with some tiny tweaks.... honey instead of sugar. High fiber flour (or all purpose flour), I just use high fiber flour. A bit extra salt for  a more rounded flavor-- in absence of extra spices (boo kids and their aversion to 'green flakes' on their pizza. For the record basil is not algae).

Trailer Gypsy's Pizza Crust

Ingredients:
1c. warm water - you want the water really warm, not lukewarm
1 Tbsp. honey
2 1/4 tsp. active dry yeast - that is how much is in 1 packet
3 Tbsp. olive oil
2 tsp. salt
2 1/2 cups flour - unbleached high fiber flour.
Spices-- I had to use 'hidden' spices. Nothing green you know.... onion powder, garlic powder....

Preheat oven to 425.

Mix water, sugar and yeast in a bowl until dissolved.
Add the olive oil, salt, and spices.
Add flour, stir until mixed well.

This will be a stickier dough than if you were making bread but it shouldn't be too moist either. Add more flour if you need to.

Let dough sit for at least 10 min. while you prepare your toppings.


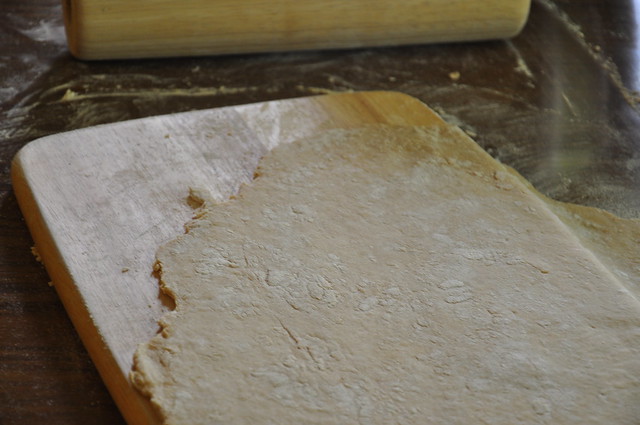
On a floured surface roll dough out into two thin sheets. Will make about 2 medium pizzas.

Friday, April 15, 2011

7 Winter Recipes under $15:: Hungarian Goulash


I was a bit tenitive about making hungarian goulash. Just because I had never made anything like it. But I used leftovers from a huge arm roast as the base and worked up from there.

The original recipe is here.

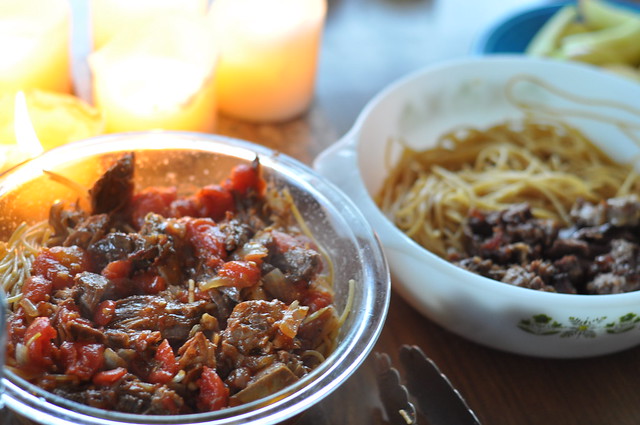
This recipe was all that it promised. Eric and I througholy enjoyed it. Like sop-up-the-last-of-the -tomato-meat-wine-juice-with-a-piece-of-bread good.

Here is my version...
Hungarian Goulash
1 pounds slow roasted arm roast-- so tender and juicy
Kosher salt
Black pepper
3 Tbsp olive oil, divided
2 large onions, sliced thinly
10 cloves garlic, roughly chopped
2 Tbsp tomato paste
1 can of stewed tomatoes
½ cup dry red wine
2 cups chicken stock
½ cup diced green peppers
2 Tbsp paprika
½ tsp caraway seeds

Heat one Tbsp olive oil in Dutch oven over medium-high heat. Heat up meat, until bubbly.

Reduce the heat to medium low. Add remaining oil, onions and garlic. Cover and sweat the vegetables, stirring occasionally. Scrape the browned bits off the bottom. Stir in tomato paste. Add wine, stock, peppers and paprika. Combine well, cover, and simmer for 10 minutes. 

We served ours over whole grain noodles. 

Tuesday, March 22, 2011

Crazy Week Night Sweets


Eric, my husband and I have worked together at most jobs we've had for the last 10 years. Mostly in resturaunts, but even now we get up together, get ready together, get the kids off to daycare together and we then, walk through the front doors of our work together.

A few years ago we worked at this place that had the best "Sweets" or sweet potato fries-- I actually almost forgot about them until on a date night we ordered sweet potato fries at another resturaunt. And we were sorely disappointed, not enough sweet or salt. And with the long-lost taste of Sweets in my mind, I could not get over it.

So last night, when I was home with two sickies. I found that I needed dinner, quick! And the two sweet potatoes staring at me on the counter got me thinking again. 

So I made my own version, a baked version with more sweet, and more salt. Not nutritious... but delicious. These are quick and the kids will eat them!
Baked Sweets
1 Tbs brown sugar 
1 tsp white sugar
1 tsp cinnamon
1/2 tsp salt
2 pounds sweet potatoes, unpeeled and cut into long strips
1 tablespoon olive oil Spray or grease a baking sheet pan. Preheat oven to 400°F. Mix brown sugar, sugar,  cinnamon, salt with  sweet potatoes and oil in a mixing bowl. Spread sweet potatoes in single layer on prepared baking pan. Bake 25-30 minutes or until sweet potatoes are tender and a little crispy.
 Photo

Friday, February 25, 2011

Stuffed French Rolls, an old family favorite.


Bet you can't eat just one!

These fabulous hot pockets are simple to make and fabulous to freeze for your one for now, one for later meal planning.

I recommend preparing a double batch.


What you need:
1 1/2 dozen french rolls
1 lb grated sharp cheddar cheese
1 large onion-diced
1 clove garlic-minced
2 2 1/2 oz cans diced black olives
2 2 1/2 oz cans diced mild green chilies
1/2 cup canola oil
1 14.5 oz can plain tomato sauce
salt to taste

Preheat oven to 350 degrees.
Mix all ingredients with the exception of the rolls and set aside.
Slice rolls across as you would for a sandwich, only make your cut so the bottom piece is thicker than the top. You will be scooping out the insides of the bottom to hold the filling mixture ( you can save the crumbs for breadcrumbs later on).
Fill the rolls, place them back together and wrap individually in foil.
Bake for one hour or freeze for another day.
Enjoy with a nice green salad.

You'll be a fan!


7 Quick Recipes Under $15 - Pulled Pork

Here's my take on the pulled pork from the 7 Quick Recipes Under $15.
I was going to cook the pork shoulder in the crock pot since I never have time to roast a cut of meat for 5 to 7 hours and then let it rest for up to 2 more.  However, the cut of meat I bought was smaller than the recommended one AND we are in the midst of yet another big snowstorm so we weren't going anywhere this afternoon.  So, roast slow and low I did and, to be honest, I wish I used the slow cooker after all.  In the end, our meat was not tender enough to pull apart with two forks.  I have cooked pork loins and roasts in the crock pot and had much more success at getting the texture I wanted.  The entire dinner would have come in around $15 IF you already had all of the spices (we did) and you didn't need to buy the hot sauce and salsa (we didn't) and you got a fab deal on the meat (try Costco for a large pork shoulder at under $2 a pound).  There is so much meat, that this would feed a crowd and is a pretty good deal in that sense.   I guess this was quick if you only counted the prep time and not the cooking time.  Don't get me wrong, the meal was pretty good and the flavor of meat was nice.  The kids ate it too with minimal complaining (except for my  5 year old son who almost died when I made him eat two bites of avocado!), so that's a big plus.  So if you're interested, here's the recipe in it's original form.  Happy Cooking!


Ingredients
3 Tbsp sweet paprika
2 Tbsp chili powder
2 Tbsp ground cumin
2 Tbsp dark brown sugar
2 Tbsp salt
1 Tbsp dried oregano
1 Tbsp sugar
1 Tbsp black pepper
1 Tbsp white pepper
1-2 tsp cayenne or chipotle
1 pork shoulder, about 8 pounds
Flour or corn tortillas
Guacamole
Salsa
Hot sauce

Mix all spices together.

Dry the pork shoulder with paper towels, place in baking pan that is bigger than the shoulder by at least a inch in length and width, and at least 3 inches deep. Sprinkle dry rub onto the surface of the shoulder and massage in such that it adheres to the surface. Coat all sides. Make sure the fat layer on the shoulder is facing up before cooking.

Place baking pan uncovered in a 225 F oven on the middle rack. Roast until the center of the shoulder reaches 190 F. This could take 5 to 7 hours. When the shoulder has reached 190 F, shut off the oven and let the roast cool for a couple of hours before removing from the oven. If the bottom of the pan is dry (or crusted with dried spices) then cover the pan with foil to retain internal moisture of the meat during the cooling period. When the temperature drops to 170 F or slightly lower, remove from oven.

Place on a large, clean work surface such as a cutting board, and remove the large sheet of crusted fat on the top. Pull apart with two forks. It will pull apart very easily.

Fill tortillas with the pork, sprinkle some of the rub on the meat, and top with salsa, guacamole and hot sauce. This dish will feed about 14 hungry friends.


***We (a family of 4) had PLENTY of meat left over from a 3.5 pound shoulder.  We'll be cooking it up with some bbq sauce, shredding it up a bit more, and having bbq pork sandwiches with cole slaw and oven fries later this week.  

Wednesday, February 16, 2011


Osso Bucco

I took this recipe from 7 Recipes under $15, a selection Joan, Kerry, Mary and Vicki and I are testing. (Just for you! Join us?)

I  fiddled with it a bit, to meet both ease of use and budget constraints for a lovely Sunday night dinner with family.

OSSO BUCCO
Prep time: 20 minutes
Total time: 120 minutes
Serves: 4
Cost: $11 per person-ish (not quite under $15)

4 large 2 ½-inch thick veal shanks, each patted dry and tied securely with kitchen string-I chose 2 shanks and two chops to see how their end result would vary. My family liked the chop (not entirely Osso) a little better, less fat and more meat to savor. I also skipped the stringing process, I've been known to cut a corner or two in the kitchen- you know, busy mom thing.
1 tsp kosher salt
½ tsp black pepper
All-purpose flour for dredging the veal shanks/chops
3 Tbsp unsalted butter
5 Tbsp olive oil
1 ½ cups dry white wine
1 ½ cups finely-chopped onion
¾ cup finely-chopped carrots
¾ cup finely-chopped celery
1 tsp minced garlic
2 Tbsp tomato paste
3-4 cups chicken stock
1 ½ cups drained canned plum tomatoes, chopped
Cheesecloth bag containing 6 fresh parsley sprigs, 4 fresh thyme sprigs, and 1 bay leaf-I passed on the cheese cloth and let these ingredients mingle with the above elements freely. I removed the bay leaf at serving.
4 Tbsp flat parsley, chopped
1 Tbsp lemon zest

Dust shanks with salt and pepper then dredge in flour. Shake off excess flour.

Heat Dutch oven with 1 Tbsp each oil and butter until very hot. Brown shanks, adding butter and oil as needed. Remove browned meat.

Lower heat and add onion, carrots, celery, and garlic. Saute about 10 minutes. Add tomato paste. Add wine and bring to a boil. Let the wine boil for about 5 minutes. Add chicken stock, tomatoes, and cheesecloth bag. When this boils, cover the pan and simmer until meat is falling off the bone, about 1 ½ hours.

Snip kitchen string off shanks and top with parsley and lemon zest.
The suggested side serving is creamy polenta- I chose couscous.

When the final meal was prepared I served the shanks/chops over couscous and ladled with sauce for a delightful dinner mimicing Sunday dinners from days gone by.

Monday, January 24, 2011

Frugal Meal Planning and Perfect Timing

Sometimes we find ourselves exactly where we're supposed to be.
I just found myself on Ruth's blog and guess what her topic is?


and she has great, great, great ideas.

Check it out.

Thank you, Ruth!