Showing posts with label Recipe. Show all posts

Tuesday, February 7, 2012

Making Almond Milk


Last weekend, my husband was away on a business trip and my kids were both occupied: little man was washing all of his micro machines in warm water at the kitchen table. And little lady was drawing kitties and cutting them out of cardboard.

I could have cleaned or folded something, but instead. I decided to make almond milk. The night before I had left the slivered almonds in a dish of water to soak. And now, the easy part of blending and straining.

This was so easy. Though I'm sure a vita-mix and cheese cloth would have done better than my regular blender and fine mesh sieve.


I felt so self sufficent making my own. Though... in honesty, I do like the store bought kind better!
Almond Milk
1/2 cup almonds soaked in water over night
2 cups cold water
2 dates chopped
1 tsp honey (or more if you like sweeter)
1/2 tsp vanilla extract (real not imitation)
pinch of kosher salt


Strain the almonds from the soaking liquid and discard liquid. In a blender place the almonds, water, chopped dates, honey, vanilla and salt. Blend about 2 minutes on high speed. Strain through fine mesh sieve or 3-5 sheets of cheese cloth. Save the almond meal for another recipe. Shake well before serving. Keep refrigerated for 3-4 days.

I really like this almond milk in coffee (but leave the last sip of it or you'll get a mouth full of tiny almond pieces). It's also delicious on granola or in oatmeal. I don't like to drink any form of Almond milk straight up.

Enjoy this simple recipe. I hope you have fun making it!

--Mary

Thursday, December 22, 2011

Cream Cheese Ice Box Cookies - Joy of Cooking

These are truly the perfect Christmas Cookies.


I'm going to go make some, roll them out and let the decorating begin! Join me?


About forty-two 21⁄4-inch cookies
Whisk together:
   2 cups all-purpose flour
   ½ teaspoon baking powder
   1/8 teaspoon baking soda
   ½ teaspoon salt

Beat in a large bowl until fluffy:
   11 tablespoons unsalted butter, softened
   3 ounces cream cheese, softened
   1 cup sugar

Beat in:
   1 large egg
   1 teaspoon vanilla
   (¼ teaspoon finely grated lemon zest)
   (Decorative sugar, cinnamon sugar, or nonpareils)

Stir in the flour mixture until blended. Refrigerate until slightly firm, about 1 hour. Shape the dough into a 12-inch log. Refrigerate or freeze until very firm. Preheat the oven to 375°F. Grease or line 2 cookie sheets. Cut the log into 3/16-inch-thick slices and arrange about 2 inches apart on the cookie sheets. Before baking, sprinkle the tops with:
   (Decorative sugar, cinnamon sugar, or nonpareils)
Bake, 1 sheet at time, until the cookies are browned at the edges, 10 to 12 minutes. Let stand briefly. Then remove to a rack to cool.

Oh, we thank you Irma Rombauer and Joy of Cooking.

Friday, July 8, 2011

Angelcots, glorious Angelcots

Last weekend I fell in love.

These beautiful, whiter fleshed apricots are called Angelcots. They'll be in your Trader Joe's or Ralph's markets very soon. We have Frieda's Specialty Produce to thank for bringing them from the world of farmers markets to selected grocers. (Just like the little kiwi, years ago.) They are magnificent.

These darlings are called Angelcots for a reason. They really are the angels of the apricot world. You know how many times you've encountered the fragrance of a ripening apricot only to find the flesh a bit flat or tart or worse, mealy? Well, not these delights. They are, somehow, sweet with a hint of tartness, almost buttery in consistency. And slightly reminiscent of the pear.

Frankly, if you like apricots, you should just buy a box and eat them as they are, as soon as they ripen (at room temperature). Here are a few ways I'll be enjoying them:
  • sliced and chilled
  • sliced in beverage
  • chopped in salad (with feta)
  • as dessert, halved and carefully peeled, with Marscapone cheese - maybe sweetened only a bit
  • with fresh, fresh blueberries
  • out of the bowl  - as God clearly intended
After I tasted them, my first thought was a simple tart. I wanted to poach them briefly -  a minute or so, (against all my instincts) just to remove the skin and impart a hint of orange peel. My instincts were right though. No poaching. In a quick minute they went from tart to Angelcot sauce. I barely had to stir them to have a luscious Angelcot Coulis. (Good for over the tart or over Vanilla Ice Cream.) Ah!

So with the remainder of my Angelcots, I went for a very simple compilation tart. It's fairly easy. Try it.

Angelcot Tart 
Printable Recipe

1 sheet frozen puffed pastry
1 cup Creme Fraiche
6 Angelcots, delicately peeled
Angelcot Coulis

1) Defrost the puffed pastry. And heat the oven as directed.

2) Trim the edges of the dough 1/2" and stack it along the side edges to make a border (you'll use this for lots of summer fruit tarts).

3) Give the edges a quick egg wash (ez: one egg & 1 Tablespoon of water, whisked)

4) Bake the pastry.

5) When it cools, brush the Creme Fraiche (mixed with 1 Tablespoon of superfine sugar) onto the the pastry bed. You can also use a thick greek vanilla yogurt or pastry cream. Pastry cream is my favorite, but this is a quick compilation and there will be another tart.

6) Cool covered in the fridge while you peel the Angelcots. (I use a tomato peeler like these - be careful.)

7) Cut the fruit into sixths and layer them as you like. They'd also be great in quarters or halves.


8) I used the coulis so no apricot jelly for me, but my French pastry counterparts will always brush fruit gel over any fruit pastry. Not this time, but if you try other fruit and want the finished, less rustic look, follow the recipe below.

And, enjoy.

Fruit Gel to Finish
Cup apricot preserves
2 Tablespoons water or liqueur like Grand Mariner
Heat and push through a stainer to remove fruit particles.

Blush over when slightly warm and allow to set. Fruit will hold it's freshness and shine beautifully.

Now, go buy some Angelcots.

My box is empty.


Friday, June 24, 2011

Making Pizza Pie


I've been making Trailer Gypsy's quick pizza crust for a while now... I needed a replacement for the little bags of chemicals and magic (ok it's just dry bagged pizza crust) that costs too much money but is SOOOO easy. And the other quick pizza crust recipes I've tried taste like moonsand. Moist and gritty. And that is not how I like my pizza.

And I can honestly say.... I love this recipe. No moonsand. Just smooth and crispy pizza. Quickly. Who says things can't be quick, cheap and good?

Plus, we make two thin crust pizzas. One with just cheese, chicken and broccoli for the kids. And one with everything for the grown-ups-- this one was three cheese, Manzanilla olives and fresh spinach. Pizza is so versatile for this time of year when gardens are producing, farmers markets are bursting and the CSA box is a treasure trove-- any veggie you can possibly imagine could probably be a topping!


I did monkey with it a little bit. Here's the original recipe.

And here is mine with some tiny tweaks.... honey instead of sugar. High fiber flour (or all purpose flour), I just use high fiber flour. A bit extra salt for  a more rounded flavor-- in absence of extra spices (boo kids and their aversion to 'green flakes' on their pizza. For the record basil is not algae).

Trailer Gypsy's Pizza Crust

Ingredients:
1c. warm water - you want the water really warm, not lukewarm
1 Tbsp. honey
2 1/4 tsp. active dry yeast - that is how much is in 1 packet
3 Tbsp. olive oil
2 tsp. salt
2 1/2 cups flour - unbleached high fiber flour.
Spices-- I had to use 'hidden' spices. Nothing green you know.... onion powder, garlic powder....

Preheat oven to 425.

Mix water, sugar and yeast in a bowl until dissolved.
Add the olive oil, salt, and spices.
Add flour, stir until mixed well.

This will be a stickier dough than if you were making bread but it shouldn't be too moist either. Add more flour if you need to.

Let dough sit for at least 10 min. while you prepare your toppings.


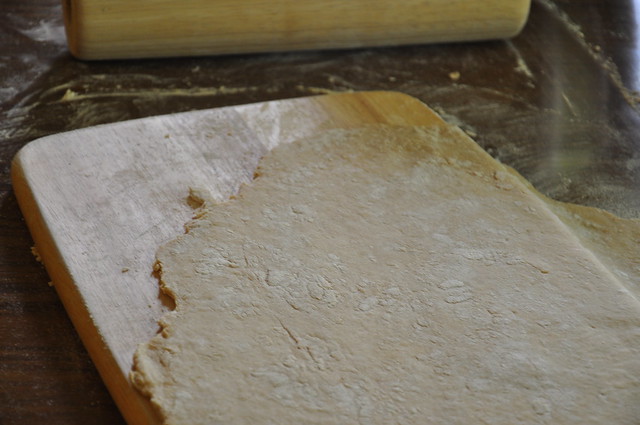
On a floured surface roll dough out into two thin sheets. Will make about 2 medium pizzas.

Tuesday, May 24, 2011

Upcycled Left Overs


One night, I made a big pot of Brown Jasmin rice with chicken. And had plenty of left overs for the next day's lunch. But come lunchtime, I wasn't thinking about sticky second-day rice. I wanted something new and fresh.


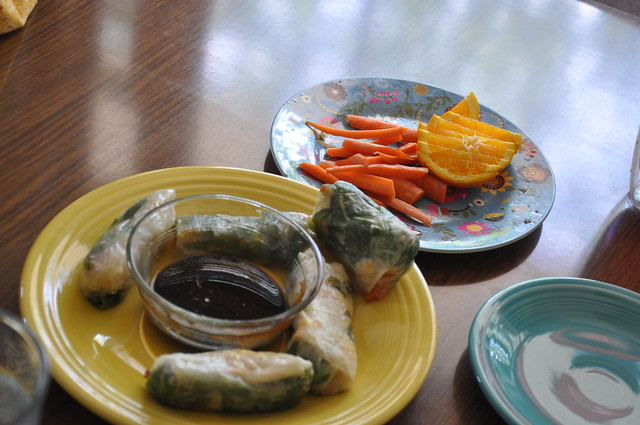
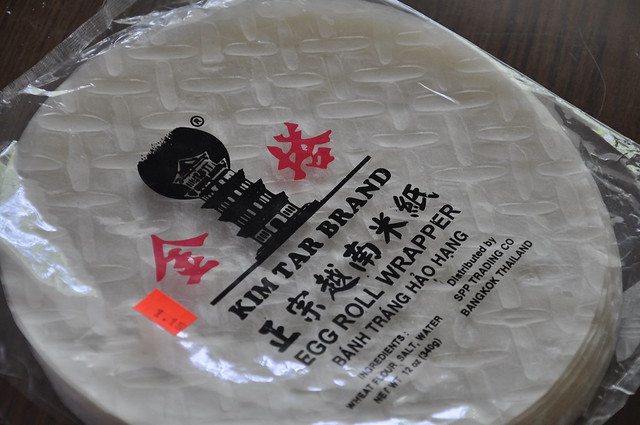
We had bought a pack of egg roll wrappers from the Asian market in Sioux City, the last time we were there. So, after a quick soak. I rolled in fresh spinach, leftover rice and chicken and julienne carrots. We made a quick dipping sauce which made the meal.

In a fry pan, I quickly browned each side. And in less than 15 minutes we had a beautiful, healthy lunch.
Egg Roll Sauce
2 Tablespoons Dark (or regular) Soy Sauce
1 Teaspoon Rice Vinegar
1 Teaspoon Hot Chili Sauce
Juice from half a small orange.

Mix all together and serve with spring rolls, pot stickers or vegetables.

Tuesday, March 22, 2011

Crazy Week Night Sweets


Eric, my husband and I have worked together at most jobs we've had for the last 10 years. Mostly in resturaunts, but even now we get up together, get ready together, get the kids off to daycare together and we then, walk through the front doors of our work together.

A few years ago we worked at this place that had the best "Sweets" or sweet potato fries-- I actually almost forgot about them until on a date night we ordered sweet potato fries at another resturaunt. And we were sorely disappointed, not enough sweet or salt. And with the long-lost taste of Sweets in my mind, I could not get over it.

So last night, when I was home with two sickies. I found that I needed dinner, quick! And the two sweet potatoes staring at me on the counter got me thinking again. 

So I made my own version, a baked version with more sweet, and more salt. Not nutritious... but delicious. These are quick and the kids will eat them!
Baked Sweets
1 Tbs brown sugar 
1 tsp white sugar
1 tsp cinnamon
1/2 tsp salt
2 pounds sweet potatoes, unpeeled and cut into long strips
1 tablespoon olive oil Spray or grease a baking sheet pan. Preheat oven to 400°F. Mix brown sugar, sugar,  cinnamon, salt with  sweet potatoes and oil in a mixing bowl. Spread sweet potatoes in single layer on prepared baking pan. Bake 25-30 minutes or until sweet potatoes are tender and a little crispy.
 Photo

Monday, March 21, 2011

Pretty Recipe Keeper


I have so many recipes on cards and as tear outs from magazines etc. I wanted a pretty place to nestle them among my cookbooks for ease of use. As luck would have it I received a beautiful photo album in a unique size that I had an Ah ha moment for ( I fancy using things for unexpected uses)! This pretty book would become my recipe friend and confidant.


Do you have a pretty album that is going unused?

I sectioned my book into 3 basic groupings of appetizers, meals and desserts. Of course you can break things down in the way it best suit you.

Now my Great Aunt Flossie's dish can be savored from it's original form - an old ingredient stained card. It will be served right along with the Crock Pot Brownie I featured last week!

Thursday, March 17, 2011

Happy St. Patrick's Day & Irish Soda Bread

I put this tasty bread into the oven this morning and the house smelled like St. Patrick's Day. No, no corned beef or cabbage, but a lovely traditional Irish Soda Bread. Warm, mildly sweet with currants and (not today) caraway seeds.

Irish Soda Bread

Heat oven to 350 degrees.
Use 2 Tablespoons of butter to season the skillet (or pan)
Whisk together:
  • 3 cups all purpose flour
  • 1 1/2 teaspoons salt
  • 1 Tablespoon baking powder
  • 1 teaspoon baking soda
  • 1/3 cup sugar
  • 1 cup currants
Add, mixed:
  • 1 3/4 cups buttermilk
  • 2 eggs well beaten
Put the bread in the skillet, pan or dish. Dot with 2 Tablespoons butter. Bake for 1 hour.
Cool and turn out or serve from the pan.

It will be served with strawberries.

How are you celebrating?

Later tonight, we'll enjoy this roast. Which spent the night soaking in herbs and Guinness!


More on that later.

Happy St. Patrick's Day to you.

Friday, February 25, 2011

7 Quick Recipes Under $15 - Pulled Pork

Here's my take on the pulled pork from the 7 Quick Recipes Under $15.
I was going to cook the pork shoulder in the crock pot since I never have time to roast a cut of meat for 5 to 7 hours and then let it rest for up to 2 more.  However, the cut of meat I bought was smaller than the recommended one AND we are in the midst of yet another big snowstorm so we weren't going anywhere this afternoon.  So, roast slow and low I did and, to be honest, I wish I used the slow cooker after all.  In the end, our meat was not tender enough to pull apart with two forks.  I have cooked pork loins and roasts in the crock pot and had much more success at getting the texture I wanted.  The entire dinner would have come in around $15 IF you already had all of the spices (we did) and you didn't need to buy the hot sauce and salsa (we didn't) and you got a fab deal on the meat (try Costco for a large pork shoulder at under $2 a pound).  There is so much meat, that this would feed a crowd and is a pretty good deal in that sense.   I guess this was quick if you only counted the prep time and not the cooking time.  Don't get me wrong, the meal was pretty good and the flavor of meat was nice.  The kids ate it too with minimal complaining (except for my  5 year old son who almost died when I made him eat two bites of avocado!), so that's a big plus.  So if you're interested, here's the recipe in it's original form.  Happy Cooking!


Ingredients
3 Tbsp sweet paprika
2 Tbsp chili powder
2 Tbsp ground cumin
2 Tbsp dark brown sugar
2 Tbsp salt
1 Tbsp dried oregano
1 Tbsp sugar
1 Tbsp black pepper
1 Tbsp white pepper
1-2 tsp cayenne or chipotle
1 pork shoulder, about 8 pounds
Flour or corn tortillas
Guacamole
Salsa
Hot sauce

Mix all spices together.

Dry the pork shoulder with paper towels, place in baking pan that is bigger than the shoulder by at least a inch in length and width, and at least 3 inches deep. Sprinkle dry rub onto the surface of the shoulder and massage in such that it adheres to the surface. Coat all sides. Make sure the fat layer on the shoulder is facing up before cooking.

Place baking pan uncovered in a 225 F oven on the middle rack. Roast until the center of the shoulder reaches 190 F. This could take 5 to 7 hours. When the shoulder has reached 190 F, shut off the oven and let the roast cool for a couple of hours before removing from the oven. If the bottom of the pan is dry (or crusted with dried spices) then cover the pan with foil to retain internal moisture of the meat during the cooling period. When the temperature drops to 170 F or slightly lower, remove from oven.

Place on a large, clean work surface such as a cutting board, and remove the large sheet of crusted fat on the top. Pull apart with two forks. It will pull apart very easily.

Fill tortillas with the pork, sprinkle some of the rub on the meat, and top with salsa, guacamole and hot sauce. This dish will feed about 14 hungry friends.


***We (a family of 4) had PLENTY of meat left over from a 3.5 pound shoulder.  We'll be cooking it up with some bbq sauce, shredding it up a bit more, and having bbq pork sandwiches with cole slaw and oven fries later this week.  

Thursday, February 17, 2011

Organic Kale Salad - The Recipe

Joan's Favorite Organic Kale Salad
1 head of organic kale (the curly kind)
Olive oil
1 orange
1 grapefruit
1 pomegranate
Handful of the following raw and unsalted seeds:
Sesame seeds
Pumpkin seeds
Flax seeds
Sunflower seeds

Wash the kale and strip/cut the leaves from the stems. With a sharp knife chop the kale leaves to fine bite size pieces (the finer the better) and place in a glass bowl. Add olive oil, approx 2 tablespoons to the kale leaves and knead the oil into the leaves making them tender and soft. Add the juice of 1 fresh orange and knead it into the leaves as well. Do not add the oil and orange juice at the same time, you will not achieve the right tenderness. Set the bowl aside. Seed the pomegranate and add the seeds to the salad. Add the raw seeds of your choice. Mix it all together and enjoy and see who fights for the last little bits left in the bottom of the bowl.

Sunday, February 13, 2011

Meal Planning: I'm Fancy!

Here's the plan for meals at our house for the next two weeks.  I didn't do any power cooking this weekend, although the veggie egg bake I made for dinner was big enough to last through a few lunches and breakfasts as leftovers.  It's always nice to have a few things tucked away in the fridge for mid-week busy-ness.

Here is the recipe for the bounty rice dish and for a pizza similar to the one I have planned for Friday.  Our pizza this week will include caramelized onions... my new thing.  I'm fancy now you see... I figured out how to make caramelized onions.  Not too tricky at all I must admit.
Here's how I do it:
4-5 cups of thinly sliced onions
3-4 tbsp olive oil
3 tbsp white wine
3 tsp white wine vinegar
4 tbsp water (plus more if needed to keep the onions from browning too much)
4 tbsp brown sugar
2 tsp dried thyme
2 tsp sea salt
Heat olive oil in a large skillet over medium low heat.  Add all ingredients and cook over medium low heat, stirring occasionally and adding extra water if necessary (I sometimes add another tablespoon or two) to prevent the onions from burning.  The onions should be done after about 30-40 minutes.
after 5 minutes in the pan
after 30 minutes in the pan

They have a sweet tang to them that we usually enjoy on a flatbread or pizza.  I'm sure they would also be marvelous over a steak or maybe as an appetizer in a dip like this one.

Tuesday, February 8, 2011

A way to their hearts is through these fabulous chocolate chip cookies


Colonial American Chocolate Chip Cookies.
( discovered Women's Day Magazine over a decade ago and credited as being created first in Colonial America in the New England area)

This recipe was given to me by a dear friend who's husband is a chocoholic. She said they made a batch at least once a week.

What I like is this tasty dough's simplicity, making a weekly dose doable if need be. I rarely buy cookies anymore, preferring the warmth and love that goes into a nice warm batch of cookies like these.

This Valentine's day bake up a batch of these delightful chocolate wonders and you will be sure to win the hearts of the ones you love.

3/4 cups firmly packed brown sugar
1/2 cup granulated sugar
1/2 cup (1 stick) softened butter
1 1/2 tsp. vanilla extract
1 egg, beaten
1 3/4 cups all purpose flour (I add another 1/8-1/4 cup to make them puffier)
1 tsp. baking soda
1/2 tsp. salt
1 12oz. package semi-sweet chocolate chips
1 cup chopped pecans (walnuts work well too)

In a mixer beat together sugars, butter, egg and vanilla. Add in flour, baking soda, and salt. Fold in pecans.
Drop by rounded teaspoon, 2" apart.
Bake on an ungreased cookie sheet for 10 minutes in a 375 pre-heated oven.

Remove and enjoy while warm.


Thursday, February 3, 2011

Alone for Dinner - A favorite salad

Tonight I found myself on my own for dinner and I swear my car drove itself to grab a few bits of this and that for the perfect salad.
I ate it before I could take a picture. So, sorry. But, so happy.

As I sat in pure dinner bliss my dog stared deeply in my eyes. I sent him back to his dinner. And then, my dear husband who didn't want dinner used his famous opening line, "whatcha got there?" The rest of the meal quickly became history.

Don't you just love a good salad!

The Un Deux Trois Salad
One head crisp romaine torn (or chopped!)
A couple of ounces of bleu cheese - tonight Stilton
One peeled and chopped Granny Smith
A couple of teaspoons of almonds (or walnuts)
A handful of shredded chicken (from last night's dinner)

Nora Ephron's Dijon Vinaigrette
Mix 2 tablespoons Grey Poupon mustard with 2 tablespoons red wine vinegar.
Whisking constantly,  add 6 tablespoons extra virgin olive oil, until creamy.

Actually, I've been making it so long, I forgot about the red wine vinegar. I've always used organic apple cider vinegar. And Melissa D'Arabian shared a secret, that when making his vinaigrette, a Parisian cafe owner added a few drops of soy sauce as a secret ingredient. Here's that link.

You can always make it more complex, adding minced garlic, minced shallots, fresh herbs you love. I always return to the basic and enjoy it with champagne vinegar and even the subtlety of rice wine vinegar. Leave out the vinegar, add lemon juice and grate Parmesan. Variations and flavors are endless.

For my taste this simple recipe means I never have to buy a bottle of dressing.

Wednesday, February 2, 2011

Crepes! The best breakfast for dinner around!


Breakfast for dinner is my go to meal in a pinch. Last week I tried my hand at Crepes thanks to Everyday FOOD magazine and WOW!
I am in a committed relationship with this french favorite!
Try it yourself and you too will fall in love. The possibilities for this relationship are endless. You can choose savory fillings as well as sweet. I chose to go sweet.
Here is a bonus, you are bound to have all the basic crepe elements on hand in your pantry and fridge at all times.


Start with
1 cup all-purpose flour
1 Tblspn sugar
1/4 Tblspn course salt ( everyday iodized salt will do)
1 1/2 cups whole milk ( I used 2%)
4 large eggs
3 Tblspns unsalted butter-melted (I salted butter)
Blend above ingredients in blender, puree until mixture is smooth and bubbles form on top-about 30 seconds.
Allow batter to sit at room temp for about 15 minutes

Then the magic happens...

Heat 12 inch skillet over medium heat (I love my stainless steel pan)
Lightly Coat with butter
Add 1/3 cup of batter and swirl to cover bottom of skillet
Cook until underside of Crepe is golden brown, about 2-3 minutes
Loosen edge with spatula, then with your fingertips, quickly flip and cook for 1 minute
slide from pan to plate and add your favorite fillings

I offered either

a few mini chocolate chips scattered across the flat surface of the crepe, then rolled up and dusted with a light coating of powdered sugar and topped with whipped cream
or
a light spread of raspberry jam, then rolled and dusted and creamed.

Happiness will envelope your whole dinner table and you might even start speaking french!


Sunday, January 30, 2011

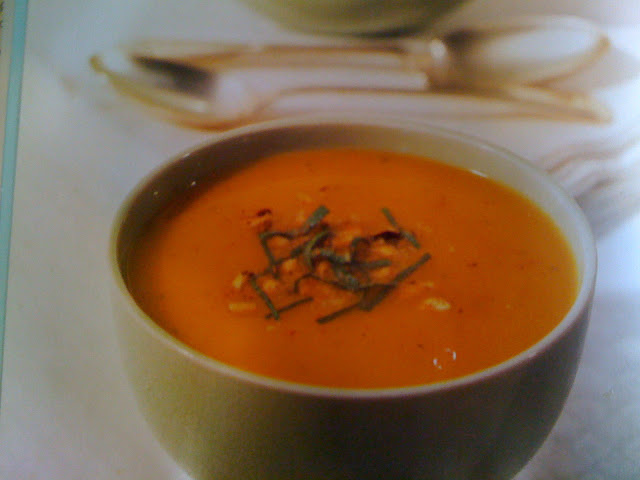
Organic Vegetarian Roasted Butternut Squash Soup.

I love making soups and stews, particularly in the winter. It must be the Irish in me. I have found though that my family will enjoy a delicious bowl of soup anytime of the year. Whatever vegetable is in season I will take advantage and make soup and freeze it. Of course living in Southern California, other than heirloom tomatoes which come and go, most other veggies are available all year round. Butternut squash is one of those and happens to be a family favorite of ours. Whether we just roast it, puree it or make into a soup, we all seem to love this particular fruit/squash/veggie.

I found this recipe in a Williams-Sonoma Soup for Supper cookbook years ago and I have enjoyed exploring and changing this recipe over the years and each time it seems to be better than the last. I like to make this soup on a Sunday, serve it with dinner on Sunday evening and then freeze the rest for later in the week or another time.

Prep Time: 30 minutes, plus 1 hour for baking squashes.
Cooking time: 20 minutes

Organic Ingredients:
2 medium to large butternut squashes (1/12-2 lb) each
2 celery stalks
2 carrots
2 yellow onions
8 fresh sage leaves, shredded
2 - 3 oz of hazelnuts
3 tablespoons of butter (sometimes I substitute olive oil)
Organic low sodium vegetable stock
Salt and pepper to taste

Roasting the squash makes it easier to peel and deepens the flavor of its flesh, making a richer, more flavorful soup. Preheat the oven to 400 F.

Wash each of the squashes skin thoroughly before cooking. Using a sharp knife cut each squash lengthwise in half, scoop out the seeds (seeds can be saved and roasted later and enjoyed as a healthy snack). Place the squash cut side down in a glass pyrex or similar dish, add approx 2 cups of water to the dish so that it's just coming up the side of the squash but not covering it. The thing I love about this recipe is I can cook the squash the day before or hours in advance of actually making the soup, just pop it in the oven while you are busy around the house, it's actually better because then it's cool enough to handle. Cook the squashes for about an hour or until tender or soft. Remove from the oven, save the water in a bowl or pot and set aside (this will be used as stock in your soup). Once it's cooled down scoop the pulp into a bowl and set aside.

While the squashes are cooling, in a saucepan over low heat, melt the butter. Add the onions, celery and carrots, stirring occasionally, until the onions are tender and translucent, 8-10 mins. Add the sage leaves (I always have organic sage growing in my herb pot). Add the squash pulp to the pot, as well as the water/stock you set aside from roasting, then add enough vegetable stock to cover the ingredients in the pot. Bring it to a boil, stirring occasionally to avoid burning the veggies and reduce heat to a nice simmer, continuing to stir occasionally, I like to cook it slow (although the recipe says 20 mins of cooking time) I tend to let it simmer longer and slower I think this adds to the flavor of the soup. While the soup is cooking I put the hazelnuts in a food processor and grind them well till there are no hard pieces of nuts, so just before a powder consistency. Once the soup is cooked, working in batches, puree the soup in a blender and with each batch being pureed add some of the hazelnut so that it all gets blended together. The blended soup has a rich and creamy consistency. Return to a clean saucepan over low heat and serve in warmed bowls.

We usually have a delicious salad and some warmed bread. I don't add salt or pepper in the cooking process of this soup and in fact I don't add seasoning at all to mine when I eat it, I personally don't think it needs it, let me know what you think.

If I'm going to freeze some of the soup which I usually do I will fill 16 oz paper containers like the one in the picture which I have found at either Surfas in Culver City (they don't always carry them though) or at Smart and Final stores, don't forget to buy the lids to fit. I write the name of soup, making a note that it has nuts (in case I am serving someone who is allergic to nuts) and the date on the lid and put it in the freezer for a future lunch or dinner. When you take it out of the freezer, with a sharp knife cut a line down the side of the container at the seam and you will be amazed at how easy it is to peel the paper right off the frozen soup and pop the soup in a pot over low heat so it doesn't burn, it takes about 10 mins. to warm the frozen soup and voila.
Recycle the paper container and lid.


Saturday, January 29, 2011

Spatchcocked Chicken with Tomatoes - Recipe

Use a 3-4 pound chicken. Turn it breast side down on a cutting board and starting at the bottom, cut upward with kitchen shears, along the backbone. Cut along the other side and remove backbone. Turn the chicken and flatten it in true butterfly style by applying pressure with your palm. (Here's a video of a more complete method and a more refined method, which makes it easier to cut for serving.)

Spatchcocked Chicken with Tomatoes
Preheat oven to 500 degrees.
Season spatchcocked chicken with coarse salt and ground pepper and place, breast side up, in a pan (or on a cookie sheet) with 3 unpeeled garlic cloves, smashed. With the tip of a paring knife, pierce 1 pint cherry tomatoes. Add to pan and drizzle tomatoes with 1 teaspoon olive oil; season with salt and pepper. Pour 1/2 cup dry white wine and 1/3 cup water into pan. (we forgot the wine and it was delicious...) Roast chicken until juices run clear when pierced between breast and leg (to 165 degrees at the thickest part of the meat) 30-40 minutes. Let rest 5 minutes. Sprinkle with 1/4 cup basil leaves before carving.

Taken from Martha Stewart Everyday Cooking July, 2010. 
Also see Martha Stewart's website recipe.

Thursday, January 27, 2011

Happy family food, happy family and friends - Lasagna Soup


There is nothing better than walking in the door from a busy day to find the aroma of a delicious home cooked meal lingering in the air. This meal is one of those miracle meals that is savory enough for the adult palate, yet pleasingly simple to tantalize the mouths of babes.

The added plus to this meal which ties in nicely with Kerry's meal planning post from yesterday, is to double it for a planned meal at a later date. When preparing the recipe, make a double batch, freeze one to put in on your two week planner for 2 to 4 weeks from now. Keep accumulating meals this way and you end up with little fuss and lots of peace of mind for meals to come all year long.

Tonight I will serve one batch to my daughter's Girl scout troop and then in two weeks to my family at home.


The Recipe;
Lasagna Soup ( though it's thick like stew)
compliments of Family Fun Magazine's Meredith Deeds recipe 2/09
2 teaspoons olive oil
1 1/2 pounds Italian sausage (bulk or casing removed)
2 onions, finely chopped
4 garlic cloves, minced
2 teaspoons oregano
1/2 teaspoon red pepper flakes
2 Tablespoons tomato paste
1 28 oz can diced tomatoes
6 cups chicken broth
2 bay leaves
8 oz fusilli pasta (uncooked)
1/2 cup finely chopped fresh basil
8 oz ricotta cheese
1/2 grated Parmesan
1/4 teaspoon salt
Pinch of pepper
2 cups shredded mozzarella

1. In a large pot, heat olive oil, add sausage and saute, breaking it up into small pieces. until sausage is no longer pink.
2. Add onions and saute until softened.
3. Add garlic, oregano, and red pepper flakes and saute.
4. Add tomato paste and saute until rusty brown.
5. Add tomatoes with their juice, the broth, the bay leaves and bring to a boil.
6. Reduce and heat for 3o minutes.
7. Add the uncooked pasta, then increase heat to medium and boil until pasta is tender to the bite.
8. Discard bay leaves, stir in basil, season with salt and pepper to taste.
9. In a small bowl, combine ricotta, parmesan, the 1/4 teaspoon of salt and pinch of pepper.
10. To serve, place 1 1/2 tablespoons of ricotta mixture in each bowl, sprinkle with mozzarella and ladle the soup over the top. Makes about 13 cups.

Enjoy!


Tuesday, January 25, 2011

Meal Planning and a Bonus Recipe

I doodle out a meal plan for my family every two weeks.  I find that a good amount of time for us to plan ahead.  No matter how well I plan though, things always get shifted and changed, but it's a routine now and it works.  Here's our plan from last week and this.
Now for the bonus recipe:
Easy Tex-Mex Frittata
I made this for breakfast using leftovers from the taco salad we had last week.  By my calculations, the whole thing topped out at less than 300 calories.  Not too shabby.
Heat a small, oven-proof, non-stick pan and coat with cooking spray.  Add 1/4 cup chopped tomatoes and 1/3 cup cooked black beans.  I also had about 2 tbsp of seasoned ground turkey leftover from the salad too.  (Who saves that amount?  It worked for this though!)  Heat the "filling" ingredients through, then whisk together 1 egg and 2 egg whites with about 1 tbsp of water.  Pour the eggs into the pan over the heated tomatoes and beans.  Cook until bottom is set.  Sprinkle about 2 tbsp of sharp cheddar cheese over the top and shake on hot sauce as desired.  Pop the pan into a 325 degree oven for about 5 minutes until the eggs have set.  This easy and filling breakfast can be made with a huge variety of leftovers.  Maybe next time you should save those two spears of asparagus, the few bites of ham, or the little bit of parmesan... it just might turn into a terrific breakfast.

Saturday, January 22, 2011

Monkey Bread - Saturday morning fun

Monkey bread came into our family in the 70's when my grandma found a recipe and began serving it with dinner on occasion. Edith's version was made like a dinner roll, completely savory (and buttery) and built in bites like the one in the picture. But ours today, the one in the picture, is a cinnamony-sweet breakfast treat - something we love to make, especially with friends or the cousins.
This particular version came from our fabulous friend, Bonnie, who introduced it as a breakfast treat for kids on mornings when she drove them to school. Her big boys (her trees!) love it - it was sure to be a hit. So, on those early, yummy, cozy mornings, when she wasn't delighting them with crepes or breakfast burritos, she made Monkey Bread. My kids wanted, desperately, for me to make it too.

This particular recipeis calls for frozen bread dough, butter, sugar, cinnamon and a knife. I learned in my first tries that you must let the dough not just thaw, but rise and that bigger pieces are better than smaller pieces.

Here's our super simple recipe:
1) Thaw a loaf of frozen bread dough. We like Bridgeford.
2) Heat your oven to 350 degrees.
3) Spray a bundt or angel food pan with Pam.
4) Melt a stick of butter, place it in a shallow dish or bowl.
5) Place about 1:4 ratio cinnamon:sugar in a shallow dish or bowl - you could use a whole cup
6) Cut the risen dough into bite sized pieces (we cut the loaf in width-wise strips and then  into thirds).
7) Assemble by dipping cut bread into first butter then sugar and build in the pan.
8) Save left over butter or c/s for next time!
8) Bake in 350 over for about 35 minutes. (The dough at the top of the pan will be lighter than that pictured.)
9) Cool a few minutes, then turn the ring of yumminess over on a pan and serve.

There are several recipes for monkey bread. Erin's has ice cream in the mix! And there's even a kit you can buy.

What I love the most about monkey bread is how it makes my monkeys jump for joy!