Saturday, December 31, 2011

Thinking about food

So much in the blog-o-sphere is about the thing I made and my recipe. It's what we do here at What Am I Cooking Central, of course. But what about the conversations about food? The things we learn to do, the things we love about cooking, the Essence of Eats?

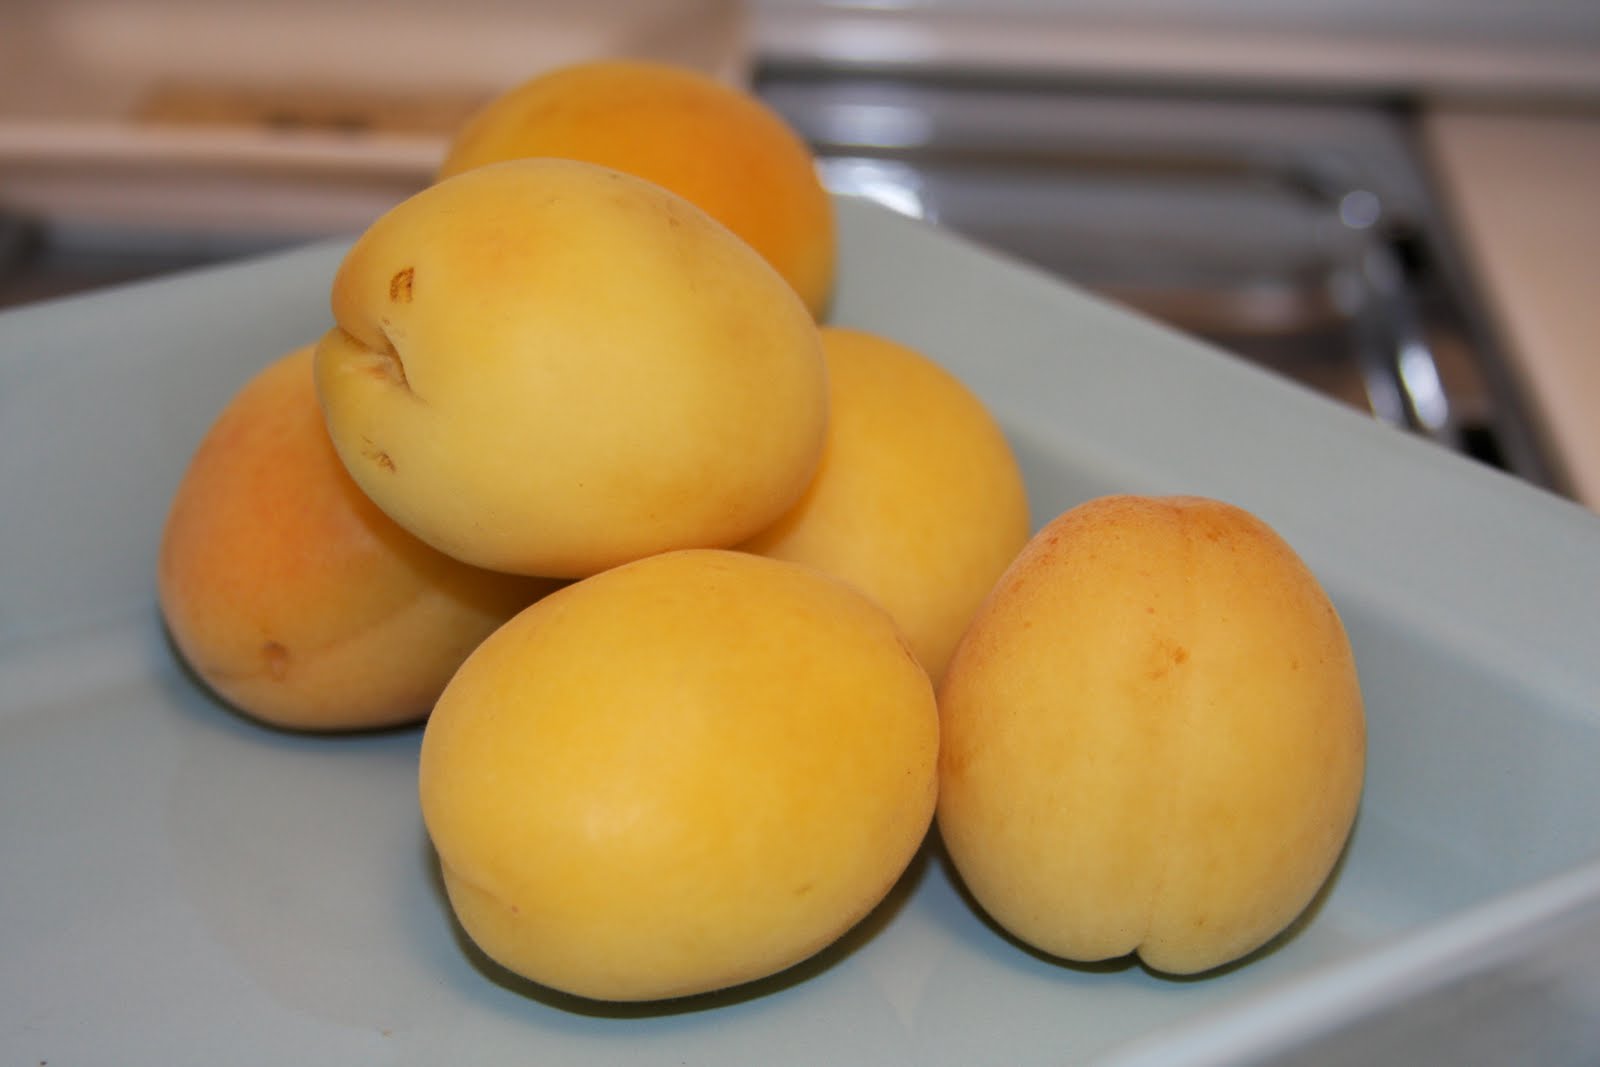
My friend Mary and I sit and talk about vegetables and crops of apples and the differences in flavors and bite the way the wine friends talk about wine varietals. Now, her job, her J-O-B, the thing she's paid to do each week, is think about and learn about what's happening in food and specifically, in the biggest Farmer's Market on the left coast. But we talk about it all (and have for years) because we just enjoy it. It's more than what we're throwing together to feed a clan. There's the joy in it that gave Mrs. Rombauer the idea for the title of the book, we can depend on, JOY OF COOKING.  (It's historical. I laugh when I see the book's spine through the glass door of kitchen book space - thinking of how in Julie & Julia, Julia Child called her, "Mrs. Joy.")

I also spend time with Marjorie talking about food ideas and on Christmas day as we were eating the Tater Tot casserole Janet brought to the breakfast gathering, we were secretly trying to sleuth out the ingredients. (The recipe has been long illusive to us, though we've asked. It is a favorite at the gathering and, I thought I understood why you might keep it close.) Not long after we finished quietly throwing ideas around, "cream cheese and sour cream, nutmeg?" she came and apologized for forgetting to share it with me. She really forgot I wanted it. (I think she took pity on me, thankfully. My two kids would eat the whole pan, given the option.) And it turns out it's an Emeril Lagasse recipe. Mine all mine! You can find it here: Kicked Up Mac and Cheese.

See what we do when we talk about it? It. The deliciousness and fun we have compiling? I learned how to seed a pomegranate over at Food Wishes this week with no blood and no purple fingers and was on the phone with my mom within minutes to share the fun. She immediately went after two she had on her counter and called back almost giddy with delight. She'd seeded two pomegranates in 20 minutes rather than the 30 it usually takes her for one. We laughed and asked each other what took us so long to learn this over and over as she shared her amazement.

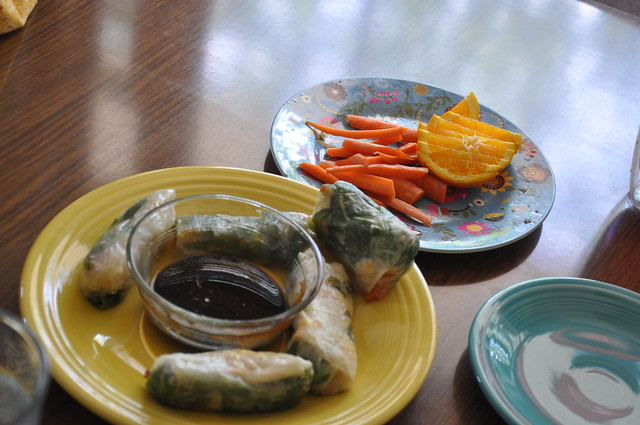
Food is fun. Yesterday, following my son's amazing presentation of Chicken and Mushrooms, my girlie spent time on line and found recipes for Shrimp Fettucini Alfredo, a Caesar where you keep the Romaine leaf whole and an apple cake dessert. She wants to feed us for New Year's Eve.  I'm all for it.

Let's keep the fun of all the Christmas holiday cooking (and the time to plan, create and share) in our hearts as this New Year arrives. And let's plan to offer what we enjoy in the conversation and the recipe sharing all year through.

Happy New Year to you. And Bon Appetite!

Thursday, December 29, 2011

Chicken & Mushrooms. Done!

We did it. And when I say we I mean my 15 year old son was at the helm.
We made this: just chicken and mushrooms.

The meal is really simple with a little bit of finesse. Chicken breasts down to sear, flip, continue, add mushrooms, move to the oven, remove breasts, cook on the stovetop, deglaze with water, cook down and serve.

Oh my.

No original pics today, the boy needed his sous chef! (This is from foodwishes, you need to see this fabulous site.)


We served these alongside sweet potatoes( baked at 400 for almost 90 minutes) and a miners leaf salad with just olive oil and tomato vinegar. Yum.

Do try.

Tuesday, December 27, 2011

Chicken & Mushrooms

This is what I'll be doing today. Through Dorie Greenspan's blog I happened on to the genius of Chef John at Food Wishes.

I vote we all just cook this today and call each other to discuss!

Enjoy.

Thursday, December 22, 2011

Cream Cheese Ice Box Cookies - Joy of Cooking

These are truly the perfect Christmas Cookies.


I'm going to go make some, roll them out and let the decorating begin! Join me?


About forty-two 21⁄4-inch cookies
Whisk together:
   2 cups all-purpose flour
   ½ teaspoon baking powder
   1/8 teaspoon baking soda
   ½ teaspoon salt

Beat in a large bowl until fluffy:
   11 tablespoons unsalted butter, softened
   3 ounces cream cheese, softened
   1 cup sugar

Beat in:
   1 large egg
   1 teaspoon vanilla
   (¼ teaspoon finely grated lemon zest)
   (Decorative sugar, cinnamon sugar, or nonpareils)

Stir in the flour mixture until blended. Refrigerate until slightly firm, about 1 hour. Shape the dough into a 12-inch log. Refrigerate or freeze until very firm. Preheat the oven to 375°F. Grease or line 2 cookie sheets. Cut the log into 3/16-inch-thick slices and arrange about 2 inches apart on the cookie sheets. Before baking, sprinkle the tops with:
   (Decorative sugar, cinnamon sugar, or nonpareils)
Bake, 1 sheet at time, until the cookies are browned at the edges, 10 to 12 minutes. Let stand briefly. Then remove to a rack to cool.

Oh, we thank you Irma Rombauer and Joy of Cooking.

Christmas Cookies!


Let's go!

1 1/2 cups all purpose flour
1/4 teaspoon salt
1/2 teaspoon baking soda
1/2 cup unsalted butter, room temperature
1/2 cup granulated white sugar
1 large egg beaten
1 teaspoon pure vanilla extract

Cookies
In a separate bowl whisk together the flour, salt and baking soda. Set aside. (No mention of a sifter here.)

In the bowl of your electric mixer (or with a hand mixer), beat the butter and sugar until light and fluffy (about 3-4 minutes). Add the beaten egg and vanilla mixture and beat until you have a smooth dough. Wrap the dough in plastic wrap and refrigerate for about one hour (or overnight) or until firm enough to roll.

Preheat oven to 350 degrees F and place rack in the center of the oven. Line two baking sheets with parchment paper.

Remove the chilled dough from the refrigerator and, on a lightly floured surface, roll out the dough to a thickness of 1/4 inch. Keep turning the dough as you roll, making sure the dough does not stick to the counter. Cur out shapes using a lightly floured cookie cutter and transfer cookies to the prepared baking sheet. Place the baking sheets with the unbaked cookies in the refrigerator for 10 to 15 minutes to chill the dough which prevents the cookies from spreading and losing their shapes while baking.

Note: if you are not going to frost the baked cookies, you may want to sprinkle the unbaked cookies with colored crystal or sparkling sugar.

Bake cookies for about 8-10 (depending on size) or until they are just beginning to brown around the edges. Remove from oven and let the cookies cool on the baking sheet for a few minutes before transferring to a wire rack to finish cooling. Frost with royal icing and sparkling sugar, if desired. Be sure to let the royal icing dry completely before storing. (This may take several hours.)

Frosted cookies will keep several days in an airtight container. Store between layers of parchment paper or wax paper.
Makes about 20 - 3 inch cookies.

For Royal Icing with Egg Whites:
1 large egg white
1 teaspoon fresh lemon juice
1 1/2 cups confectioners (powdered or icing) sugar, sifted

In the bowl of your electric mixer (or with a hand mixer), beat the egg white with the lemon juice. Add the sifted powdered sugar and beat on low speed until combined and smooth. The icing needs to be used immediately or transferred to an airtight container as royal icing hardens when exposed to air. Cover with plastic wrap when not in use.

Thanks to Joy of Baking
Picture courtesy: sodahead.com 

Wednesday, November 30, 2011

Warren Pears - coming soon!

I'm not really a coming soon gal. More a "hey! look what we did!" gal. But I've been hearing so much about the Warren pear found here from Frog Hollow Farm.

Isn't it beautiful with that blushing cheek?

Don't buy them just yet, they may be coming to a market near you.
I'm tasting tonight and will report!

Oh joy!
There is nothing like the fragrance of a winter's pear.

Tuesday, October 4, 2011

You know you're busy when:

...your husband says, "Dear, you haven't posted anything since the potatoes. I know we've eaten."

Hmmm.

Thursday, September 29, 2011

Roasted Rosemary Potatoes

There's something about the family of new potatoes that takes me right to my roots of English cooking and my dad's delightfully crisp yet tender roasted potatoes.

So when a lovely bag of The Little Potato Company's Terrific Trio tri- colored baby potatoes came to my door I knew just what I wanted to do, with a little twist... fresh rosemary.

For busy moms there is something so helpful about fresh pre-washed and bagged veggies that makes the world seem doable. Because of their size (ranging from 1"-1 1/2") I was able to achieve my roasted wish in short time.

Here's what I did for deliciously tender and flavorful taters:

Cut the whole bag of potatoes into eighths.
From the garden, mince a spring of Rosemary.
In a glass baking dish, drizzle olive oil liberally along the bottom of the pan coating it.
Add the potatoes and rosemary to the baking dish along with one minced garlic and salt and pepper to your taste.
Toss all ingredients to coat.
Bake at 375 for 35 minutes, tossing occasionally. I went for a lightly roasted skin (roasting tip: the longer you bake, the crispier the skin).

That's it!

I coupled them with breaded chicken tenders and a green salad. The dinner was good but my kids thought the potatoes were great!


Friday, September 23, 2011

Delightful Little Potatoes

These little guys found their way into my kitchen and I'm so glad they did.

These Piccolo potatoes are from The Little Potato Company. And they are all they promise to be.
-  Quick to cook
-  No need to peel
-  I wash 'em anyway, but you don't have to.

I remember the first Yukon Gold potato I ever tasted. It brought to mind Grandma Edith's point of view. All a perfectly boiled potato needs is a little butter, salt and pepper. Yukon's took that idea to a new level and so do these delightful babies. They are full of flavor. So in preparing I didn't want to so so far as oven roasting with rosemary. Just wanted to see how they stood on their own - with just a little delicate enhancement. They are stars!

As dinner, right next to some tasty sliced sirloin, they performed brilliantly.
I started with about 1 Tablespoon of good olive oil in a pan and let it warm to high and popped in the potatoes whole.


Once in the pan, I reduced the heat to medium high and watched them for a bit and then covered them.


At about the 10 minute mark, I tossed in a handful of garden cherry-sized tomatoes.


Then, just before serving, I finished with a spot of butter.


And some fresh chopped tarragon - and salt and freshly ground pepper.


The flavor is delightful -- the tomatoes (I mixed cherry toms and some baby heirlooms) little sweet with a hint of tang. I suggest you try them soon. With the cherry tomatoes, they make a nice bridge from summer to fall.

A couple of tips? After piercing with a fork to test a couple of the bigger ones, I simply cut them in half (to fit in with their friends).


The potatoes can be found at Ralph's Fresh Fare. I say, go get 'em.

Saturday, September 17, 2011

Dinner on a Bread Slice

With fall advancing, here's an easy one with great results and it comes right out of Mom's 1960's kitchen.

Dinner on a Bread Slice
  • One wide loaf French Bread (usually sold in the market bakery, no skinny baguettes) one or two days old cut horizontally
  • 2 pounds ground beef 
  • 1 egg
  • 1 package Lipton Onion Soup Mix
  • 2 cups shredded sharp cheddar cheese
Set your conventional oven to 350 degrees.
Cut the bread horizontally and place them on aluminum foil wide enough to completely cover them for cooking. (We never seem to have the wide aluminum foil, so I cut two lengths for each half and fold it together to produce a big enough piece.) Set aside.

In a large bowl, mix the ground beef, egg and soup mix.

Top the bread with equal parts of the beef mixture.
Sprinkle with equal parts cheese.

Cover with foil.

Place both on a cookie sheet and bake at 350 for 45-50 minutes.

My mom always froze the second cooked loaf for reheating later. You can also freeze the second loaf before cooking, but please allow defrosting time before you bake it if you choose this route.

It's rather perfect for Sunday supper with soup too.

Try it. And tell us what you think!


Wednesday, September 14, 2011

A last word on Hatch Chilis

Just like the summer slow and busy life is over, the Hatch Chilis are just about gone. 

When last we met we were talking about tasty Hatch Chilis, weren't we?  Before we break out the pumpkin soup and the chai lattes, here are a few things we learned on our Hatch Chili adventure first: they are chilis. I've learned to think of Hatch Chili season as the season of Chili opportunity, not the harvest season for one species of chili pepper. Here we go:
  • These long green chilis are all grown in one place, Hatch New Mexico. Hatch is not really the name of a specific variety of chili, more a range within a type of chili  (that would be long green)
  • When I talked to one of my friends, she shared that she buys and roasts four pounds of Hatch Chilis each year, freezes them and uses them in all the recipes that call for chili
  • Then I talked to another friend and: well, ditto
  • Because they aren't all from the same chili variety, they're going to range in heat level - taste and divide as appropriate if you're using now or freezing
  • And apparently, the variation in heat is just part of being a chili (my brilliant fruits and veggies officiando friend tells me the variation has much to do with the stress a plant endures as the chilis are forming. Hmmmm. The become hotheads when they're stressed? I love these chilis all the more.)
  • When you roast, you can freeze them with skin on. The skin slides off more easily from the frozen state
  • You'll never have to buy a can of Ortega Chili again. (Fresh is my favorite! And Fresh/Frozen is the next best.) This should bring me to a great recipe for chili rice and it very likely will in the week to come. 
Now I'm waiting for August like it's Chili Christmas!

Tuesday, August 30, 2011

Hatch Chilis: EZ Hatch Chili Cornbread

Here's a simple, simple way to enjoy those yummy hatch chilis -- drop 'em in corn bread batter. Everyone has their favorite. We happened to have Krusteaz Honey Corn Bread in the pantry. So it became Hatch Chili Honey Cornbread.


I minced a chili, no roasting and then, lit the oven, mixed the mix, dropped the 2 Tablespoons of chilis in and baked as directed.

We were making Heirloom Tomato Sauce, so the bread became little slices of lunch with yellow Heirlooms sliced on top.

Nice heat with a little of sweet.


Monday, August 29, 2011

Hatch Chilis: First, we try salsa.

Well, it's Hatch Chili season & I've been playing around with the fun little chili from Hatch, New Mexico in my California kitchen. Here are the first things I learned:
  • Wash your hands
  • Wash your hands
  • Don't touch your face, (don't wipe your brow)
  • And, wash your hands
Yikes! The oil in these babies is hot. I also note cooking with the Hatch Chili can be a little like playing Craps. You simply can''t predict the outcome. First, I taste a nice and mild one then a scorcher. Well, at least I'm clear on what I'm up against.  I stopped by my neighborhood specialty grocer for well, a specialty item, and they were having a Hatch Chili fest. They roast, you buy and even they were separating the hot from the mild as they tasted them! I'd prefer to roast them myself -  that's another post and it's coming.

The first attempt at Casa del My House, was Roasted Hatch Chili Salsa:

I sweated onions, roasted tomatoes and Hatch Chilis and combined them with salt and a garlic clove in the food processor.

Easy and tasty.

Next time, I'll go for Roma tomatoes, the big cherry tomatoes from my garden are yummy, but a little sweet. The salsa was a bigger hit day 2 than day 1. But, isn't it always?

Click here for the recipe.


Just a spot of lime juice along with the salt was a great idea. And voila!


Sunday, August 14, 2011

Tongue of Fire Beans & Love


On my trip to the Santa Monica Farmers Market I was arrested by these beautiful shelling beans, the Tongue of Fire. They we beautifully displayed almost overflowing in baskets by the Fairview Gardens farmers. They grow more than one kind of bean, and have a range of information on them here

I felt like I just wanted to run my hands through them and let them dribble out my fingers. Thankfully my hands were full and restrained! Aren't they inviting?

 
Now, these are definitely not dried beans, with which I have lots of familiarity and facility, but fresh. I had trouble remembering their name. They look like they should be the cranberry bean. At any rate, I snagged a pound or so (with a scoop) and brought them home. 


Here's where my ignorance to their freshness set in. I left them in the bag for a couple of days and voila! they began to sprout a bit. So that night, while my summer lovin' family were craving burgers and I was not, I quickly transformed these beans into a plate of sheer delight.


 First, a little bit of bacon in the pan, and then some chopped red scallions. Then I drained and cleaned the pan, added olive oil and let the cooked meat and onions continue. I added some chicken stock, some thyme from the garden and some red pepper flakes, then the beans.

I added a teaspoon of salt and let them simmer about 20 minutes. I later read here, that you shouldn't salt them while cooking because they become tough. I didn't notice a toughness, but they were a somewhat different texture than dried beans. Quite delightful.

Next time I'll wait to salt to see the difference.


 But I won't wait to eat them. I may be in love.

Grab a spoon and join me?

Monday, July 18, 2011

Spanish Eggs from the Sonoma Diet

This is one of my favorite Saturday morning recipes for tender and delicious eggs.

My husband really enjoys these and every once in a while I get them in the pan before my daughter requests Daddy's soul food: bagels.

They are very rich in a simple flavor.

Printable recipe
1 yellow pepper, cut into thin bite-sized strips
1 fresh jalapeno chile pepper, seeded and chopped
2 cloves garlic, minced
1 Tablespoon extra-virgin olive oil
1 1/2 pounds Roma tomatoes, seeded and chopped
1 teaspoon chili powder
1/2 teaspoon ground cumin
1/4 teaspoon kosher salt
4 eggs
Kosher salt
Freshly ground black pepper
2 Tablespoons sliced almonds, toasted

1) In a large skillet cook bell pepper, jalapeno pepper, and garlic in hot oil about 2 minutes or until tender. Stir in tomates, chili powder, cumin, and the 1/4 teaspoon kosher salt. Bring to boiling: reduce heat. Cover and simmer for 5 minutes.
2) Break one of the eggs into a measuring cup. Carefully slide the egg into simmering tomato mixture. Repeat with remaining eggs. Sprinkle eggs lightly with aditional kosher slat and black peper.
3) Cook, covered, over medium-low heat for 4 to 5 minues or until whites are completely set and yolks begin to thicken but are not firm.
4) To serve, transfer eggs to serving plates with a slotted spoon. Stir tomato mixture; spoon around eggs on plates. Sprinkle with toasted almonds.

When you cut the jalapenos, wash your hands with soap and for heaven's sake, don't touch your eyes!

Sunday, July 17, 2011

The French Macaron

This is where I plan to spend some time in the next few days.

Have you tried to make The French Macaron?

My friend Marjorie and I think the salted caramel version is worth a try.

But, I'll start with chocolat. (Begin at the beginning.)

My friend Janice is living in Paris right now, dining on all things French and American and shares her opinion about the Macaron at Laduree in Paris.

Here's an article on the 10 essential tips for perfect Macaroons.
Really? 10? 

And next weekend, there's a big Macaron tasting event at a fancy mall nearby. Move over le cupcake! 


Thursday, July 14, 2011

Bechamel -- In Honor of Bastille Day

We should be dining of the delicious foods of France tonight, but I had a left-over steak salad from Chipotle and a slice of rare Filet Mignon waiting for me. Neither a Croque Monsieur or Croque Madam could keep me from that deliciousness. So, with nothing to show for the day, I offer:

A Bechamel Recipe
Printable Recipe

1 cup milk, scalded with a slice of onion, a bay leaf, a pinch of nutmeg, a couple of cloves, salt & pepper
Set aside so the flavors can mingle for 10-15 minutes
Make a roux of 1 1/2 Tablespoons of flour and 1 1/2 Tablespoons melted butter (heat until foaming)

When milk mixture is slightly cool, strain in the milk mixture and simmer, whisking for about 5 minutes.
For a thinner sauce, use 1 Tablespoon each flour and butter.

Use it in Macaroni & Cheese or any one of hundreds of uses for White Sauce. Or add parmesan and and a little tomato flesh for a nice pasta sauce.

And a bonus: my favorite Pate Sucre recipe (sweet tart dough - print it!).

And Viva la France!

Monday, July 11, 2011

Monday Meals

We're a few weeks into our CSA season here and the beautiful greens are taking center stage.  It's taken me a bit to get back on track with meal planning but I am getting back into the summer groove.  Looking back through the archives of taste a little summer has helped quite a bit.  Here's the plan for this week.

Saturday: Green pasta with homemade pesto and salad
Sunday: Stir-fried veggies, noodles, and spicy green beans
Monday:  Dinner with friends (my contribution: radishes with Hawaiian red salt, homemade lemon-blueberry frozen yogurt, and lemon-thyme shortbread)
Tuesday: BBQ tofu with kale chips and fennel crisps
Wednesday: Homemade pizza and salad
Thursday: Grilled chicken and salad with kefir "ranch" dressing
Friday:  Leftovers

What are you cooking this week?
What have you been seeing in your CSA box?

Friday, July 8, 2011

Angelcots, glorious Angelcots

Last weekend I fell in love.

These beautiful, whiter fleshed apricots are called Angelcots. They'll be in your Trader Joe's or Ralph's markets very soon. We have Frieda's Specialty Produce to thank for bringing them from the world of farmers markets to selected grocers. (Just like the little kiwi, years ago.) They are magnificent.

These darlings are called Angelcots for a reason. They really are the angels of the apricot world. You know how many times you've encountered the fragrance of a ripening apricot only to find the flesh a bit flat or tart or worse, mealy? Well, not these delights. They are, somehow, sweet with a hint of tartness, almost buttery in consistency. And slightly reminiscent of the pear.

Frankly, if you like apricots, you should just buy a box and eat them as they are, as soon as they ripen (at room temperature). Here are a few ways I'll be enjoying them:
  • sliced and chilled
  • sliced in beverage
  • chopped in salad (with feta)
  • as dessert, halved and carefully peeled, with Marscapone cheese - maybe sweetened only a bit
  • with fresh, fresh blueberries
  • out of the bowl  - as God clearly intended
After I tasted them, my first thought was a simple tart. I wanted to poach them briefly -  a minute or so, (against all my instincts) just to remove the skin and impart a hint of orange peel. My instincts were right though. No poaching. In a quick minute they went from tart to Angelcot sauce. I barely had to stir them to have a luscious Angelcot Coulis. (Good for over the tart or over Vanilla Ice Cream.) Ah!

So with the remainder of my Angelcots, I went for a very simple compilation tart. It's fairly easy. Try it.

Angelcot Tart 
Printable Recipe

1 sheet frozen puffed pastry
1 cup Creme Fraiche
6 Angelcots, delicately peeled
Angelcot Coulis

1) Defrost the puffed pastry. And heat the oven as directed.

2) Trim the edges of the dough 1/2" and stack it along the side edges to make a border (you'll use this for lots of summer fruit tarts).

3) Give the edges a quick egg wash (ez: one egg & 1 Tablespoon of water, whisked)

4) Bake the pastry.

5) When it cools, brush the Creme Fraiche (mixed with 1 Tablespoon of superfine sugar) onto the the pastry bed. You can also use a thick greek vanilla yogurt or pastry cream. Pastry cream is my favorite, but this is a quick compilation and there will be another tart.

6) Cool covered in the fridge while you peel the Angelcots. (I use a tomato peeler like these - be careful.)

7) Cut the fruit into sixths and layer them as you like. They'd also be great in quarters or halves.


8) I used the coulis so no apricot jelly for me, but my French pastry counterparts will always brush fruit gel over any fruit pastry. Not this time, but if you try other fruit and want the finished, less rustic look, follow the recipe below.

And, enjoy.

Fruit Gel to Finish
Cup apricot preserves
2 Tablespoons water or liqueur like Grand Mariner
Heat and push through a stainer to remove fruit particles.

Blush over when slightly warm and allow to set. Fruit will hold it's freshness and shine beautifully.

Now, go buy some Angelcots.

My box is empty.


Thursday, June 30, 2011

Rhubarb Sangria


A summer night-- with the breeze gently blowing and the sun softly setting requires only one thing to make it perfection. Sangria.

Eric and I have been making Sangria for years. And though it's never the same. It's got a few basic ingredients.

Fruit + Red Wine.

Seriously.

We usually get a bottle of red wine-- wine that's on sale. Shhh. Don't tell.

And in a large pitcher we combine equal parts of red wine and fruit juice. And then add cut up fruit. Fresh peaches, strawberries, black berries, oranges, limes, lemons....

Recently,  I made rhubarb juice. Naturally, I thought it would be beautiful in Sangria.

Note the very large and very cheap bottle of store bought sangria. This rhubarb juice added a bit of tang and a bit of extra sweet. It kept the sangria light and airy.

Be care, these are easy to drink on a hot summer day.

Friday, June 24, 2011

Making Pizza Pie


I've been making Trailer Gypsy's quick pizza crust for a while now... I needed a replacement for the little bags of chemicals and magic (ok it's just dry bagged pizza crust) that costs too much money but is SOOOO easy. And the other quick pizza crust recipes I've tried taste like moonsand. Moist and gritty. And that is not how I like my pizza.

And I can honestly say.... I love this recipe. No moonsand. Just smooth and crispy pizza. Quickly. Who says things can't be quick, cheap and good?

Plus, we make two thin crust pizzas. One with just cheese, chicken and broccoli for the kids. And one with everything for the grown-ups-- this one was three cheese, Manzanilla olives and fresh spinach. Pizza is so versatile for this time of year when gardens are producing, farmers markets are bursting and the CSA box is a treasure trove-- any veggie you can possibly imagine could probably be a topping!


I did monkey with it a little bit. Here's the original recipe.

And here is mine with some tiny tweaks.... honey instead of sugar. High fiber flour (or all purpose flour), I just use high fiber flour. A bit extra salt for  a more rounded flavor-- in absence of extra spices (boo kids and their aversion to 'green flakes' on their pizza. For the record basil is not algae).

Trailer Gypsy's Pizza Crust

Ingredients:
1c. warm water - you want the water really warm, not lukewarm
1 Tbsp. honey
2 1/4 tsp. active dry yeast - that is how much is in 1 packet
3 Tbsp. olive oil
2 tsp. salt
2 1/2 cups flour - unbleached high fiber flour.
Spices-- I had to use 'hidden' spices. Nothing green you know.... onion powder, garlic powder....

Preheat oven to 425.

Mix water, sugar and yeast in a bowl until dissolved.
Add the olive oil, salt, and spices.
Add flour, stir until mixed well.

This will be a stickier dough than if you were making bread but it shouldn't be too moist either. Add more flour if you need to.

Let dough sit for at least 10 min. while you prepare your toppings.


On a floured surface roll dough out into two thin sheets. Will make about 2 medium pizzas.

Thursday, June 16, 2011

Chicken - Simple and Yummy

No fancy cookbook is needed when Meredith, my coiffing gal is around. Besides a couple of highlights, coverage of some, um, gray paint at the scalp line and a great cut, she's dashing off kid friendly recipes.

So here it is: grab a big package of thighs and one of drumsticks. Make the marinade by mixing everything in a big ziplock bag, pour it over, pop it all in the oven and voila, in a Lipton Onion Soup Mix way.

My family loved the flavor - I finished it in the broiler for some tasty caramelizing.

Easy. Tasty. On the grill? What's not to love?

Monday, May 30, 2011

Monday Meals

Monday Meal Planning

It's been a long while since I've posted our meal plans and to be honest, it's been a while since I've done much planning.  For the next couple of weeks I'm working on cleaning up and cleaning out our chest freezer to make way for all of the fabulous treasures that will be coming our way when our CSA share starts in a few weeks.  I'm working on using up sauces and veggies that are hanging out in there.  Here's what I've come up with so far.
Monday: Pasta with shrimp, spinach, feta, and homemade tomato sauce
Tuesday: Grilled chicken sausages and mediterranean whole grain salad
Wednesday: Homemade pizza
Thursday: Green pasta
Friday: Grilled chicken and corn and zucchini casserole
Sunday: Salmon with potatoes and greens
Monday: Swimming lessons- out to dinner
Tuesday: Noodle salad with thai peanut sauce
Wednesday: Pasta with chicken and peppers

Mexican Pot Roast & Marinade

I have come to love this recipe for pot roast. Lots of flavor and really yummy the next day for pan fried tacos. I cut back to 1 cup of beer and use 2 cups of beef stock, adding 1 Tablespoon of sugar. The beer can leave a bitter taste. Fine for me, but not great for the kiddos. Chef hats off to the girls at the Border Grill. They are creative geniuses.

Pot Roast Ingredients 

2 1/2 to 3 pounds beef chuck

  • Beer Marinade, recipe follows
  • 3 tablespoons pork lard or vegetable oil
  • 2 medium onions, cut into thick slices
  • 4 garlic cloves, finely mashed
  • 3 medium tomatoes, peeled, seeded, and chopped
  • 1 teaspoon sea salt
  • 1 teaspoon freshly ground black pepper
  • 2 bay leaves
  • 3 cups dark beer
  • 3 cups water
  • 4 large carrots, peeled and cut into chunks
  • 4 medium potatoes, peeled and cut into chunks

Directions

Trim the beef chuck and place in a container just large enough to hold it. Pour the Beer Marinade over and refrigerate several hours or overnight.
Preheat the oven to 350 degrees. Lift the meat from the marinade and pat dry. Reserve the marinade. Over a medium high heat, in a heavy Dutch oven, heat the lard. Brown the steak on both sides. Add the onions and cook for 3 minutes. Add the garlic, cook for 2 minutes and then add tomatoes, salt, pepper, bay leaves, beer, water, and the reserved marinade.
Cover and bake about 45 minutes. Add the carrots and potatoes. Cover and cook an additional 45 minutes or until the meat is very tender. 
You can also do this in a slow cooker on low all day. Or in the oven for several hours at 300 degrees.
 

Beer Marinade Ingredients

  • 1/2 cup olive oil
  • 1 cup dark beer
  • 1/4 cup lemon juice
  • 4 cloves garlic, smashed
  • 1 1/2 teaspoons sea salt
  • 1 teaspoon freshly ground black pepper
  • 2 bay leaves
  • 1 teaspoon dry mustard
  • 1 teaspoon basil
  • 1 teaspoon oregano
  • 1 teaspoon thyme

Directions

To prepare the marinade, whisk together the oil, beer, and lemon juice. Add the garlic, salt, pepper, bay leaves, mustard, basil, oregano, and thyme. Mix well.

Found at foodnetwork.com. 

Tuesday, May 24, 2011

Upcycled Left Overs


One night, I made a big pot of Brown Jasmin rice with chicken. And had plenty of left overs for the next day's lunch. But come lunchtime, I wasn't thinking about sticky second-day rice. I wanted something new and fresh.


We had bought a pack of egg roll wrappers from the Asian market in Sioux City, the last time we were there. So, after a quick soak. I rolled in fresh spinach, leftover rice and chicken and julienne carrots. We made a quick dipping sauce which made the meal.

In a fry pan, I quickly browned each side. And in less than 15 minutes we had a beautiful, healthy lunch.
Egg Roll Sauce
2 Tablespoons Dark (or regular) Soy Sauce
1 Teaspoon Rice Vinegar
1 Teaspoon Hot Chili Sauce
Juice from half a small orange.

Mix all together and serve with spring rolls, pot stickers or vegetables.

Friday, May 20, 2011

GiGi's Swedish Meatballs


Passed on to me by my sister in law from her Gi-Gi (Great Grandmother) in Minnesota, these delightfully easy meatballs have been a great addition to our family dinners and Annual Halloween parties!
The are best prepared in a crock pot simmering for on low for several hours with minimal attention.
Here I paired them with American Mac n' Cheese, Japanese Edamame beans for a little international fare.

Cool tip-You know the recipe is fast when one of the main requirements is that the main element be frozen!

Here's what you need:
A party bag of frozen seasoned [likely noted as italian] meatballs
if you prefer a non-meat meatball- no problem, the only crock requirement is that your protein item start frozen.
1 12 oz. jar of your favorite BBQ sauce
1 10 oz. jar of your favorite grape jelly
1 tablespoon vinegar (calls for apple cider but I have even used balsamic)

Here's what you do:
fill a crock pot 2/3rds of the way to the top
add the 3 additional ingredients and stir to coat all the meatballs
simmer on low for 5-8 hours stirring occasionally if life permits.

DONE!
You could pair this with a more traditionally Swedish fare by adding egg noodles in a white sauce as your side dish.
Whatever you add, these meatballs will be the talk of the town!


Wednesday, April 27, 2011

Prince William's Chocolate Crunch Cake

My kiddos, at least my girlie, will be with me watching the Royal Wedding on the telly early Saturday morning. And to celebrate the occasion, we'll enjoy one of Prince William's favorite treats.

Tea & Sympathy's Easy Recipe

 chocolate crunch cake!

Prince William’s Chocolate Crunch Cake
Serves eight.

Ingredients
For the cake
1 box graham crackers
¼ c. raisins
¼ c. nuts, chopped
5 oz. dark chocolate
5 oz. milk chocolate
1 stick butter, room temp.
1 14-oz. can condensed milk

For the topping
5 oz. dark chocolate
1 tsp. milk
1. In a large metal bowl, crumble graham crackers into bite-size pieces. Add raisins and nuts.
2. In a saucepan, melt chocolates, butter, and milk. Stir frequently so chocolate doesn’t burn.
3. Add melted mixture to crackers and stir until dispersed.
4. Line an 11-by-7-inch pan with waxed paper. Pour mixture into pan; spread evenly. Refrigerate for 2 hours.
5. For the topping, combine ingredients in a saucepan; stir until melted.
6. Remove cake from fridge and cover with topping. Cut into squares and serve.

So, grab a blanket and a cup of tea. Lift your pinkie and enjoy.
Thanks to Daily Candy for publishing this recipe so we can all feel a little connected to the festivities.

Friday, April 15, 2011

7 Winter Recipes under $15:: Hungarian Goulash


I was a bit tenitive about making hungarian goulash. Just because I had never made anything like it. But I used leftovers from a huge arm roast as the base and worked up from there.

The original recipe is here.

This recipe was all that it promised. Eric and I througholy enjoyed it. Like sop-up-the-last-of-the -tomato-meat-wine-juice-with-a-piece-of-bread good.

Here is my version...
Hungarian Goulash
1 pounds slow roasted arm roast-- so tender and juicy
Kosher salt
Black pepper
3 Tbsp olive oil, divided
2 large onions, sliced thinly
10 cloves garlic, roughly chopped
2 Tbsp tomato paste
1 can of stewed tomatoes
½ cup dry red wine
2 cups chicken stock
½ cup diced green peppers
2 Tbsp paprika
½ tsp caraway seeds

Heat one Tbsp olive oil in Dutch oven over medium-high heat. Heat up meat, until bubbly.

Reduce the heat to medium low. Add remaining oil, onions and garlic. Cover and sweat the vegetables, stirring occasionally. Scrape the browned bits off the bottom. Stir in tomato paste. Add wine, stock, peppers and paprika. Combine well, cover, and simmer for 10 minutes. 

We served ours over whole grain noodles. 

Thursday, March 31, 2011

Quick Grilled Chicken Soft Tacos Ole'


Ah, with the slightest hint of warm weather fun it's Grilled Chicken Taco Time!

This can be thrown together in a matter of minutes and prep can take place even the day before for a really on the fly but good for you dinner for all.


Here's what you need:

Taco size corn tortillas
4 Skinless Chicken Breasts
1 tspn grilled chicken seasoning
1 Avocado
1 Jar of your favorite Salsa
1/2 Lb graded Cheddar Cheese
Lettuce (optional)

Prep: about 10 minutes
Cook: about 11 minutes

Here's what you do:

Take clean, lightly seasoned (grilled chicken seasoning) whole chicken breasts and toss on your Outdoor Grill, George Foreman Grill, or in your Broiler for about 6 minutes on side one and another 5 on side two until cooked through.
Remove from grill and set aside to cool slightly.
while chicken cools, grate your cheese, or for another time saver use pre-grated cheese from your favorite market.
Steam your torillas for a few minutes to soften-I use a shallow pot with a steamer basket.
Slice the avocado into chunks, and chop your lettuce if using.
Now, back to your grilled chicken, cut the breasts into 1 inch cubes.
Now you're ready to assemble!
Set all the ingredients out in separate bowls to allow your family to build their own fun.
Pile the ingredients to your liking in double tortillas for a sturdy meal, top with salsa and you are ready to go!
Add a side of black or vegetarian refried beans for good measure. Ole'

Tuesday, March 22, 2011

Crazy Week Night Sweets


Eric, my husband and I have worked together at most jobs we've had for the last 10 years. Mostly in resturaunts, but even now we get up together, get ready together, get the kids off to daycare together and we then, walk through the front doors of our work together.

A few years ago we worked at this place that had the best "Sweets" or sweet potato fries-- I actually almost forgot about them until on a date night we ordered sweet potato fries at another resturaunt. And we were sorely disappointed, not enough sweet or salt. And with the long-lost taste of Sweets in my mind, I could not get over it.

So last night, when I was home with two sickies. I found that I needed dinner, quick! And the two sweet potatoes staring at me on the counter got me thinking again. 

So I made my own version, a baked version with more sweet, and more salt. Not nutritious... but delicious. These are quick and the kids will eat them!
Baked Sweets
1 Tbs brown sugar 
1 tsp white sugar
1 tsp cinnamon
1/2 tsp salt
2 pounds sweet potatoes, unpeeled and cut into long strips
1 tablespoon olive oil Spray or grease a baking sheet pan. Preheat oven to 400°F. Mix brown sugar, sugar,  cinnamon, salt with  sweet potatoes and oil in a mixing bowl. Spread sweet potatoes in single layer on prepared baking pan. Bake 25-30 minutes or until sweet potatoes are tender and a little crispy.
 Photo

Monday, March 21, 2011

Pretty Recipe Keeper


I have so many recipes on cards and as tear outs from magazines etc. I wanted a pretty place to nestle them among my cookbooks for ease of use. As luck would have it I received a beautiful photo album in a unique size that I had an Ah ha moment for ( I fancy using things for unexpected uses)! This pretty book would become my recipe friend and confidant.


Do you have a pretty album that is going unused?

I sectioned my book into 3 basic groupings of appetizers, meals and desserts. Of course you can break things down in the way it best suit you.

Now my Great Aunt Flossie's dish can be savored from it's original form - an old ingredient stained card. It will be served right along with the Crock Pot Brownie I featured last week!